nanosaur cover head
In this page are collected all cover that you can use with nanosaur. Starting from a simple MIPI camera, such as the Raspberry Camera V2 or stereocamera like the Stereolabs ZEDmini or a Intel Realsense d435i.
The Nanosaur design is under license Creative Commons Attribution-NonCommercial-ShareAlike 4.0 International License.
Camera
This documentation is for a Raspberry PI camera v2 cover. The Bill of Material needed is in the table below:
| Qt | Part |
|
|
|
|
Notes |
|---|---|---|---|---|---|---|
| 1 | Raspberry PI camera v2 |
Amazon |
Amazon |
Amazon |
Amazon |
3D print
| Quantity | Part | 3D view |
|---|---|---|
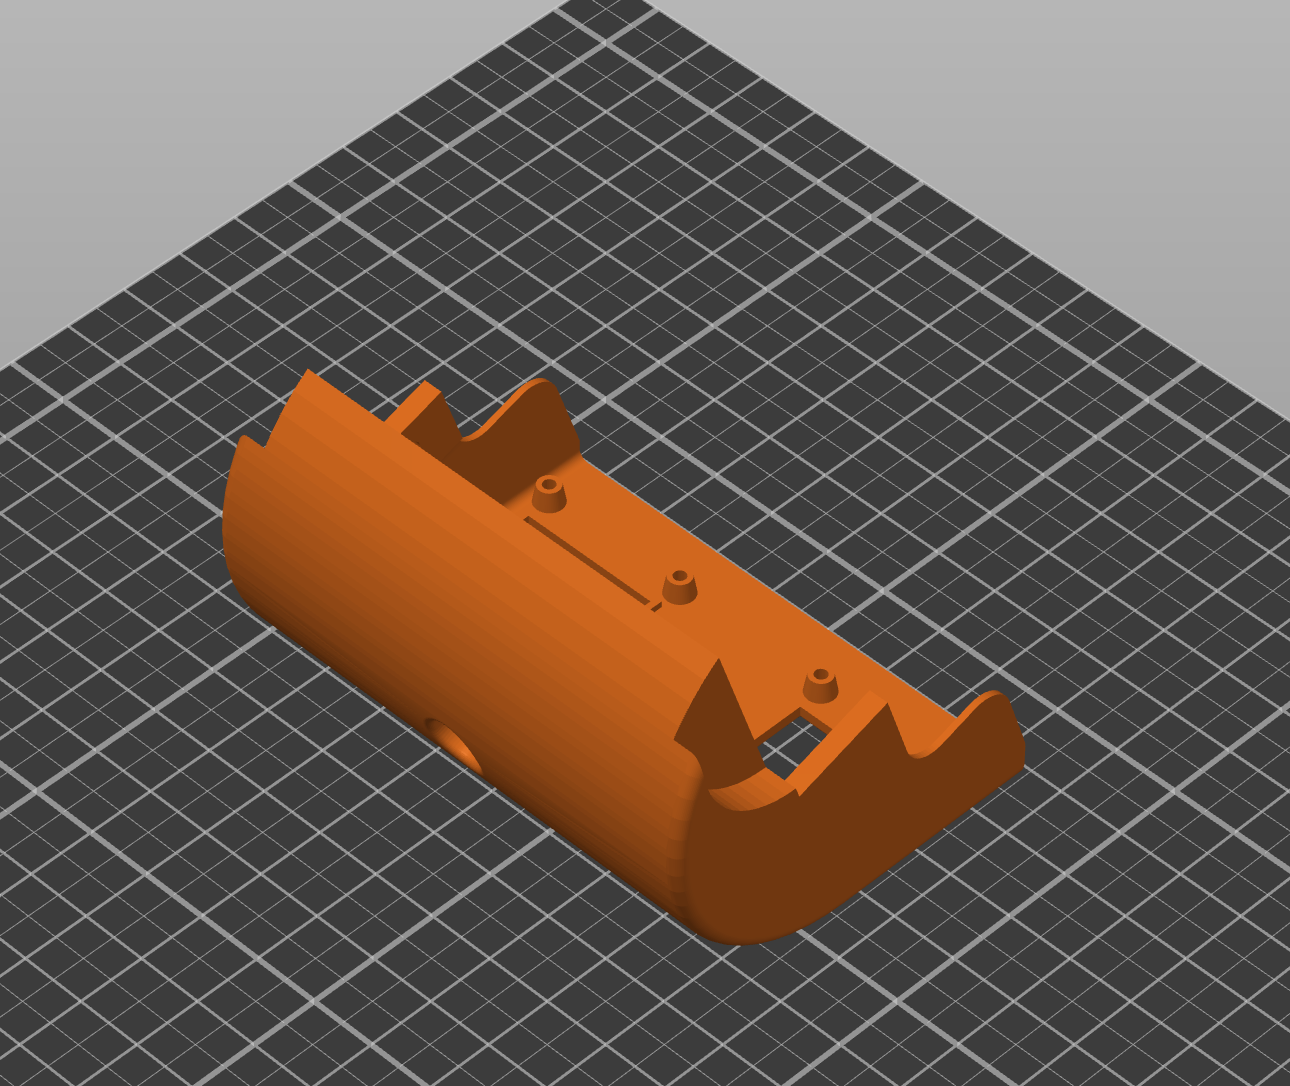
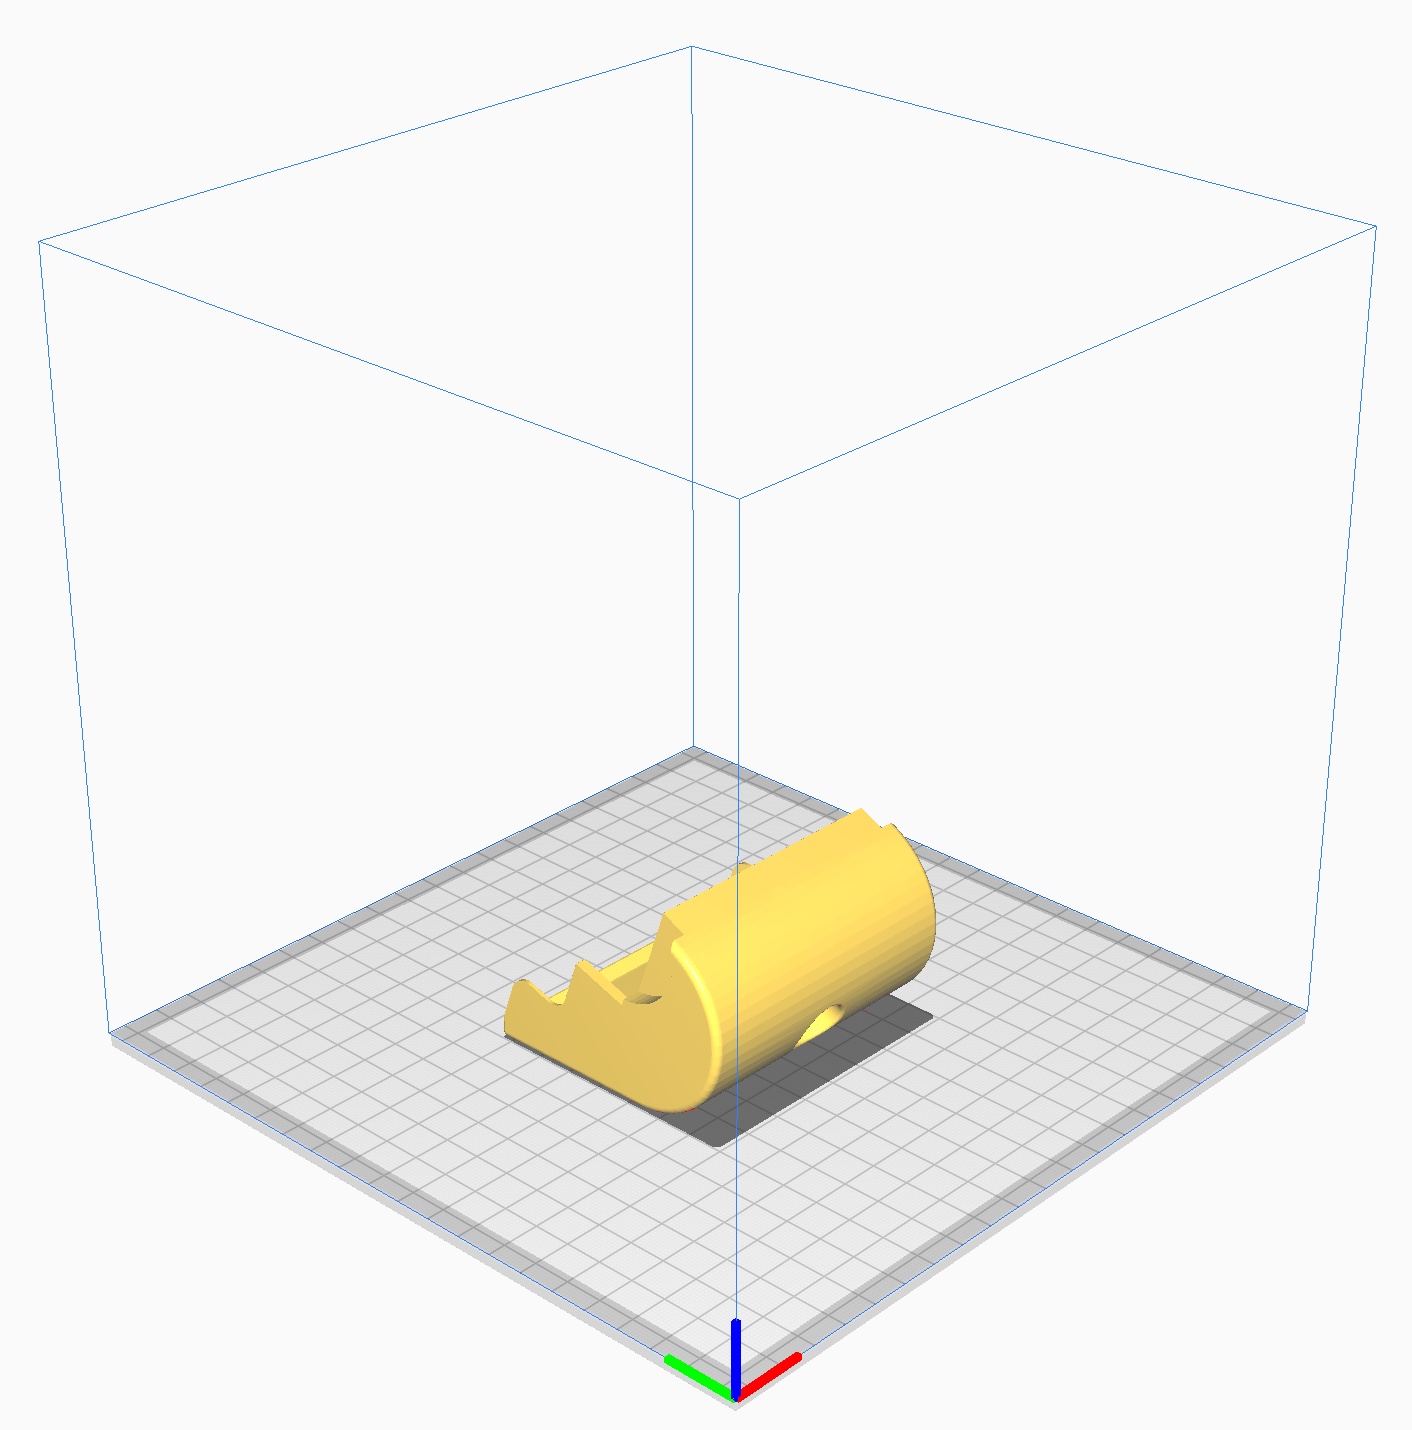
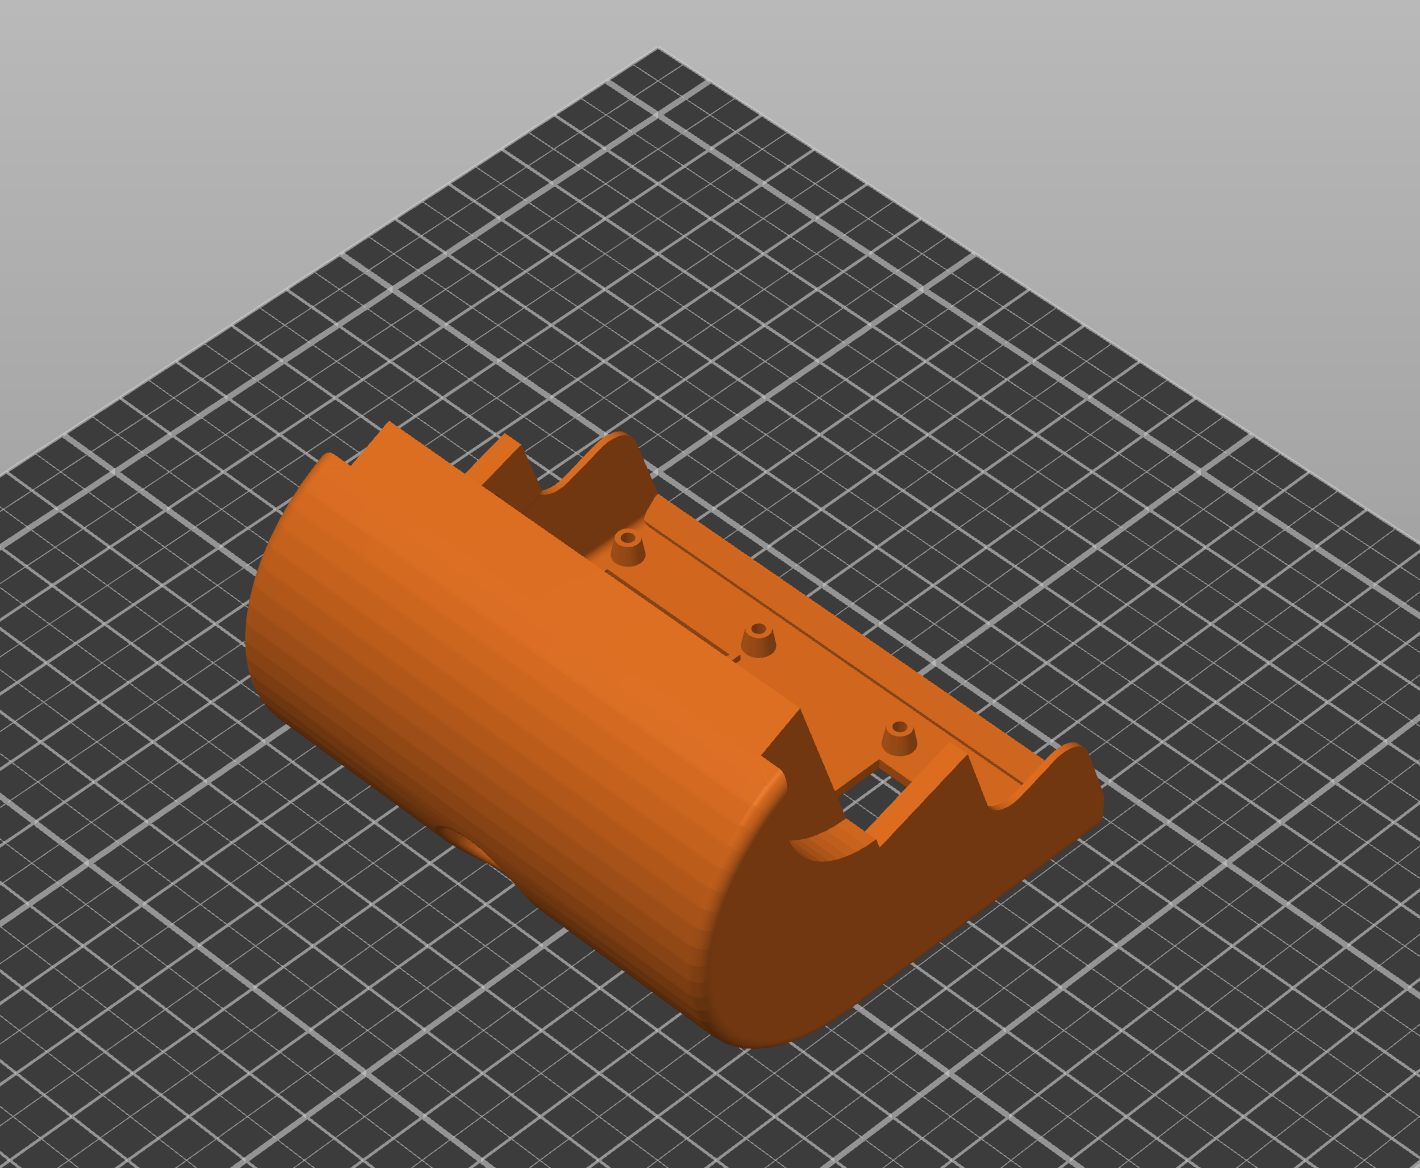
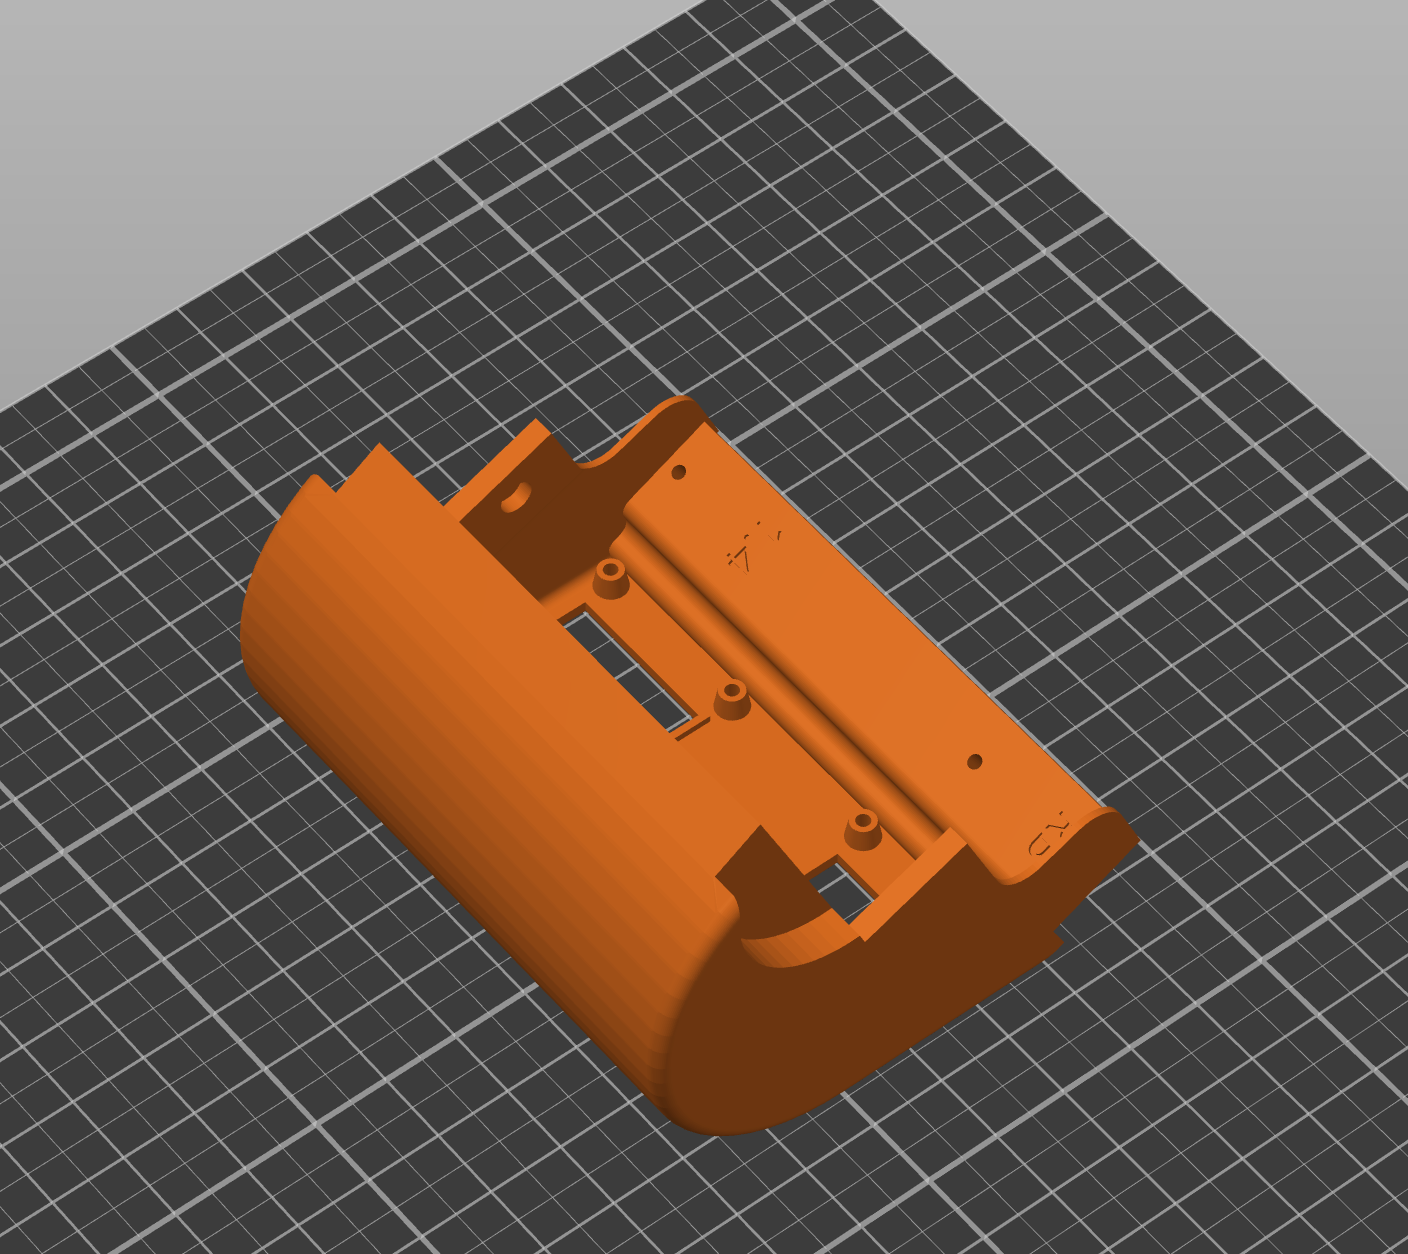
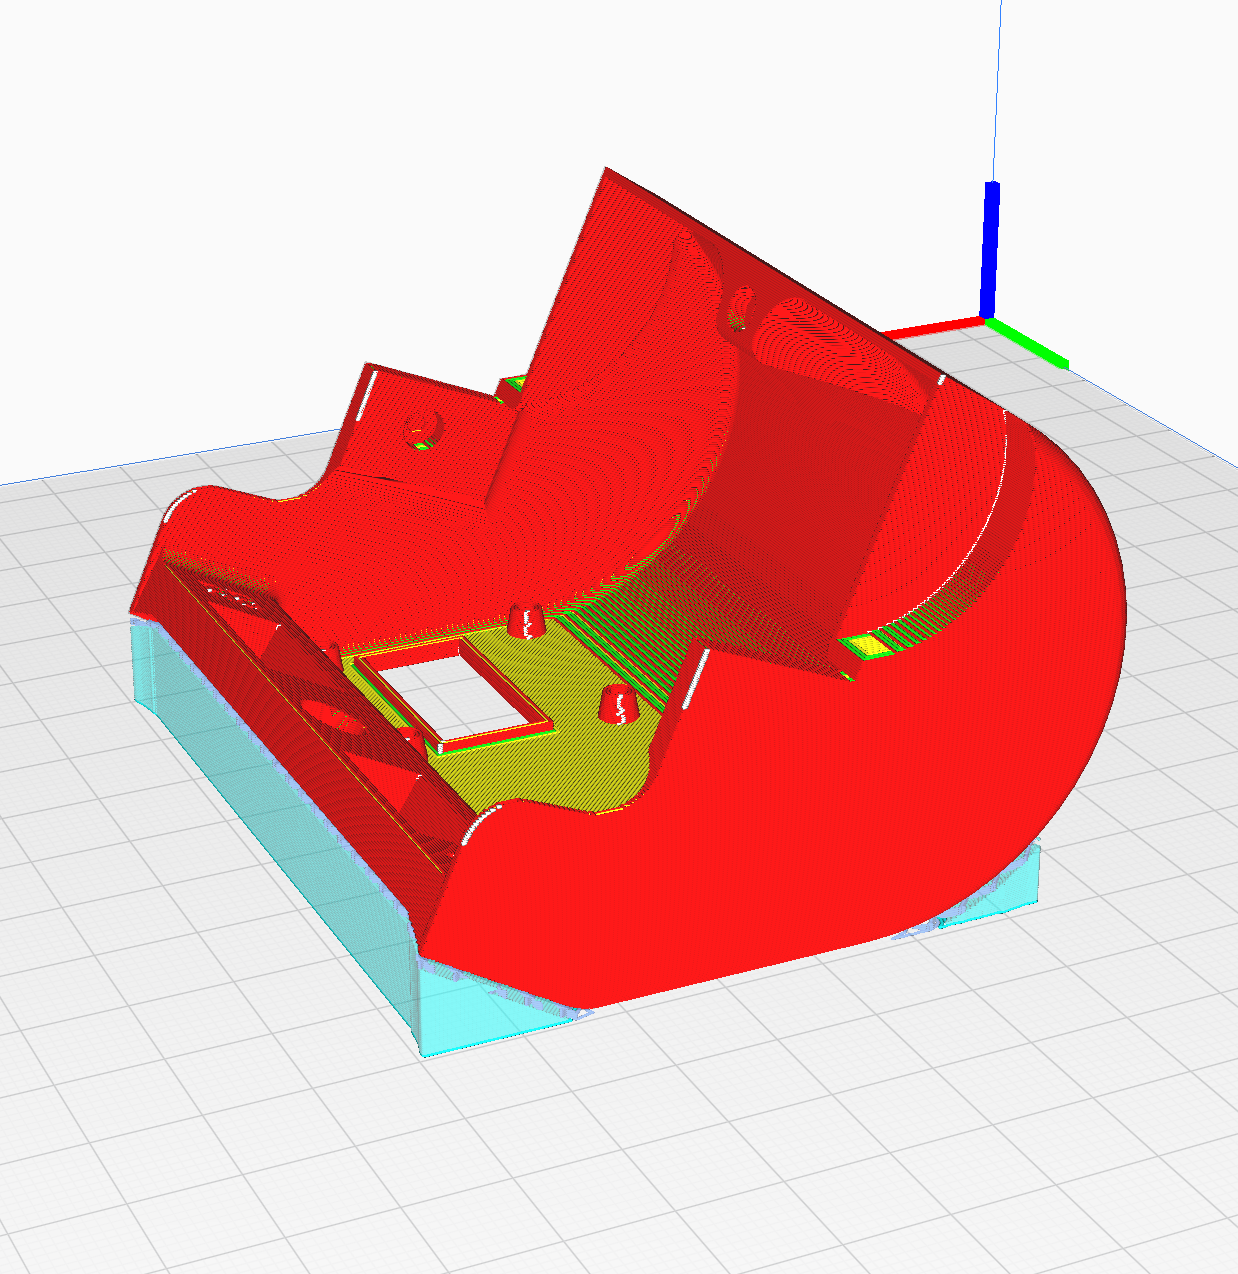
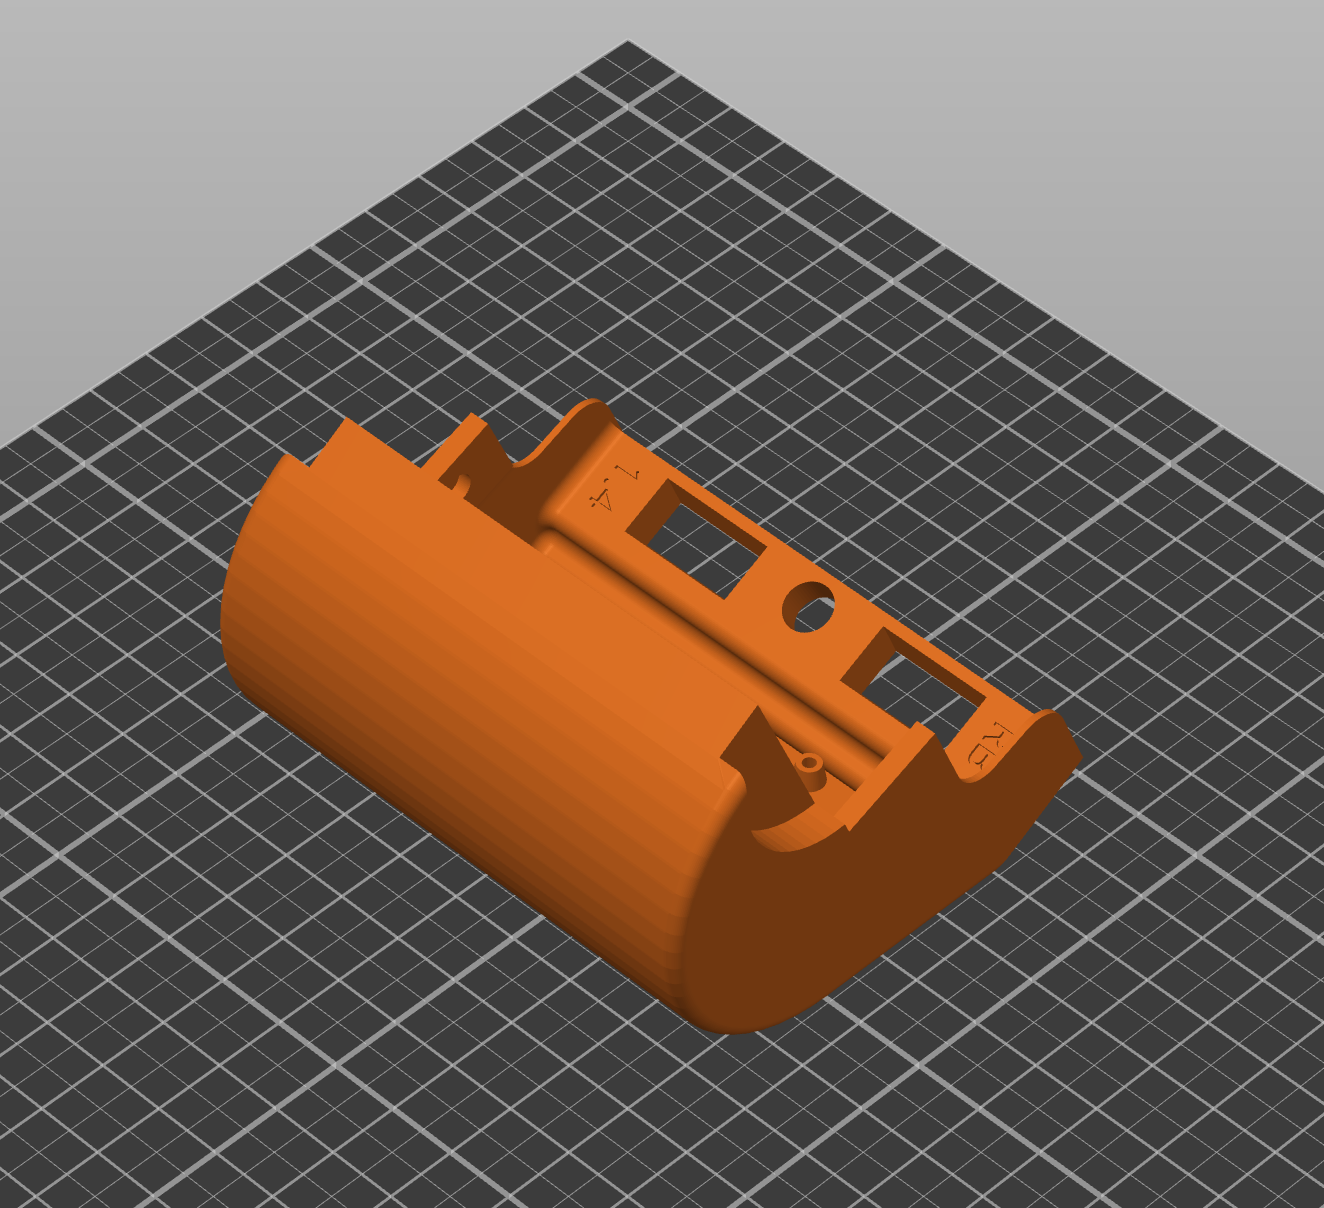
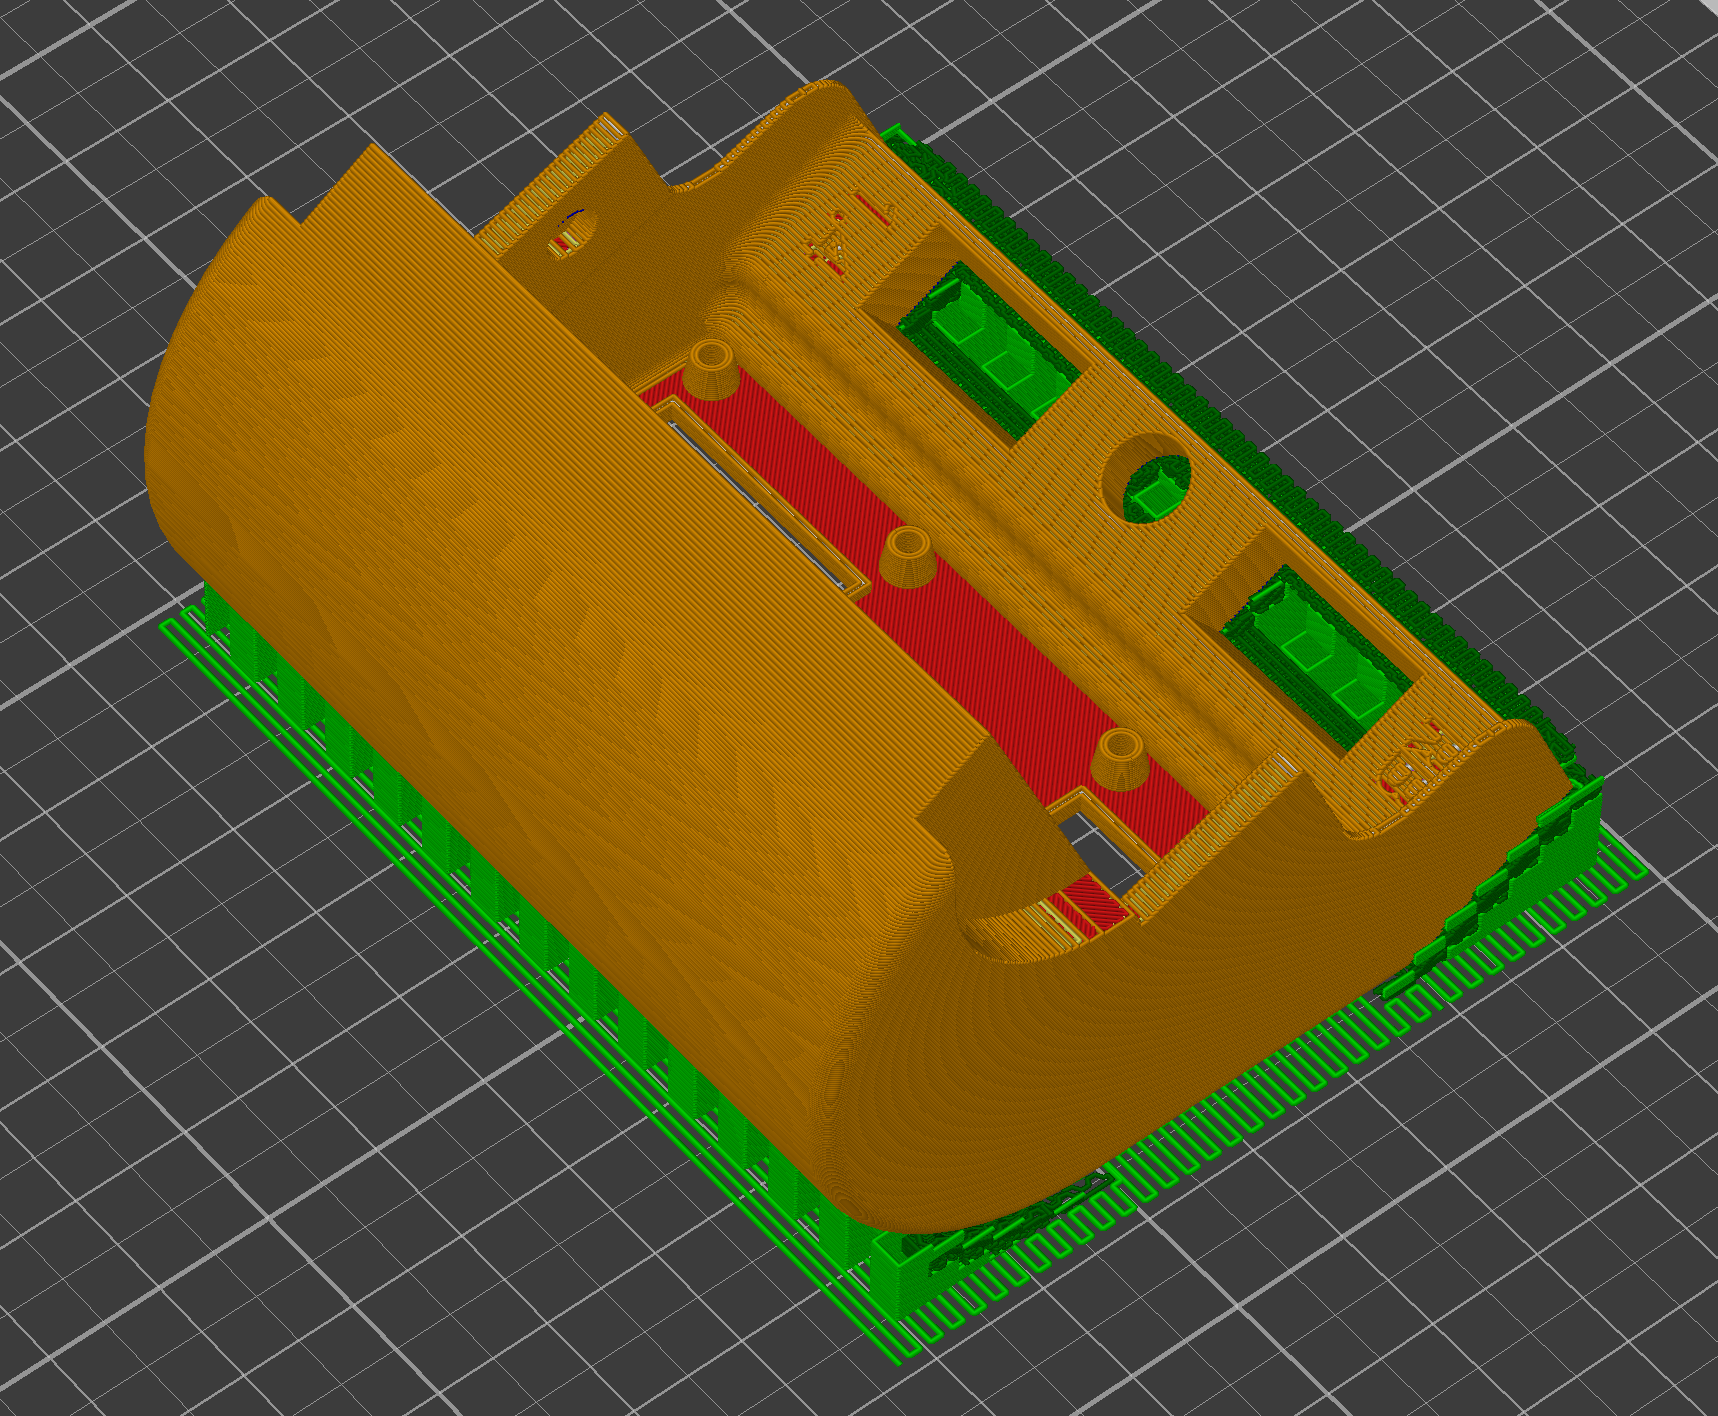
| 1 | cover.stl |

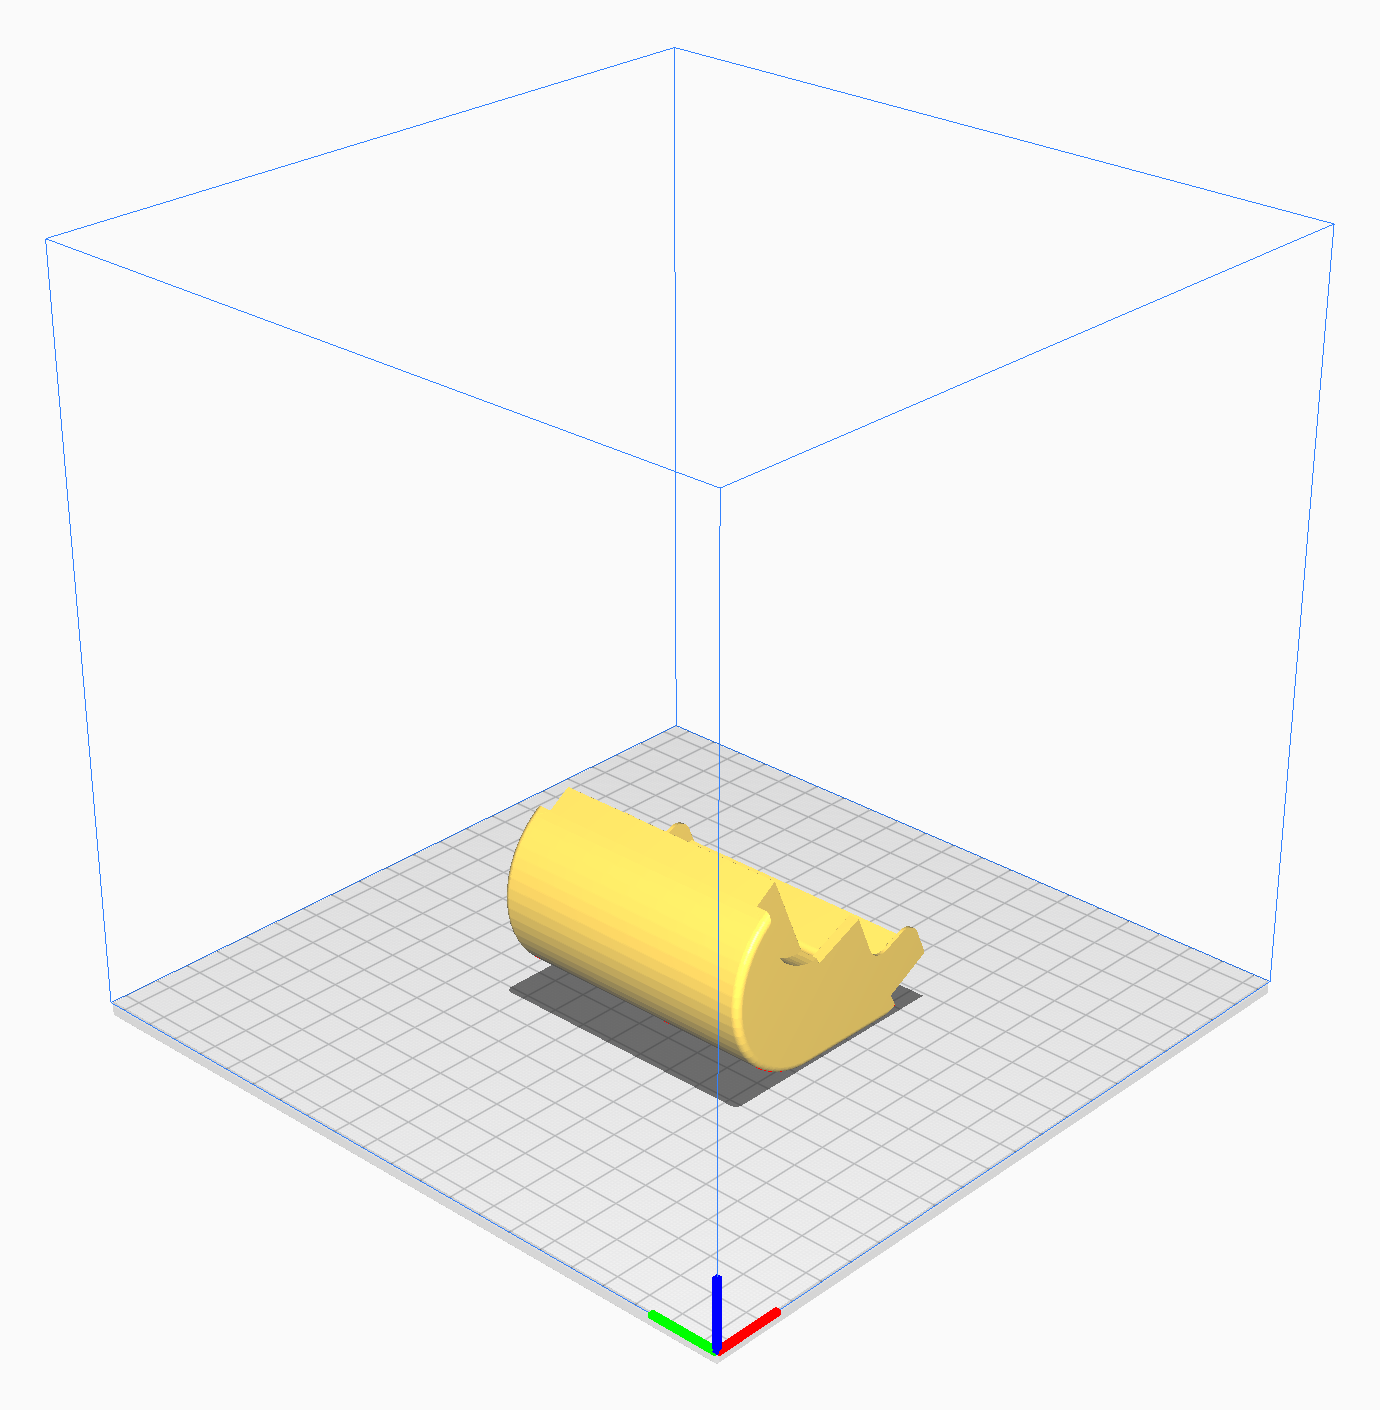
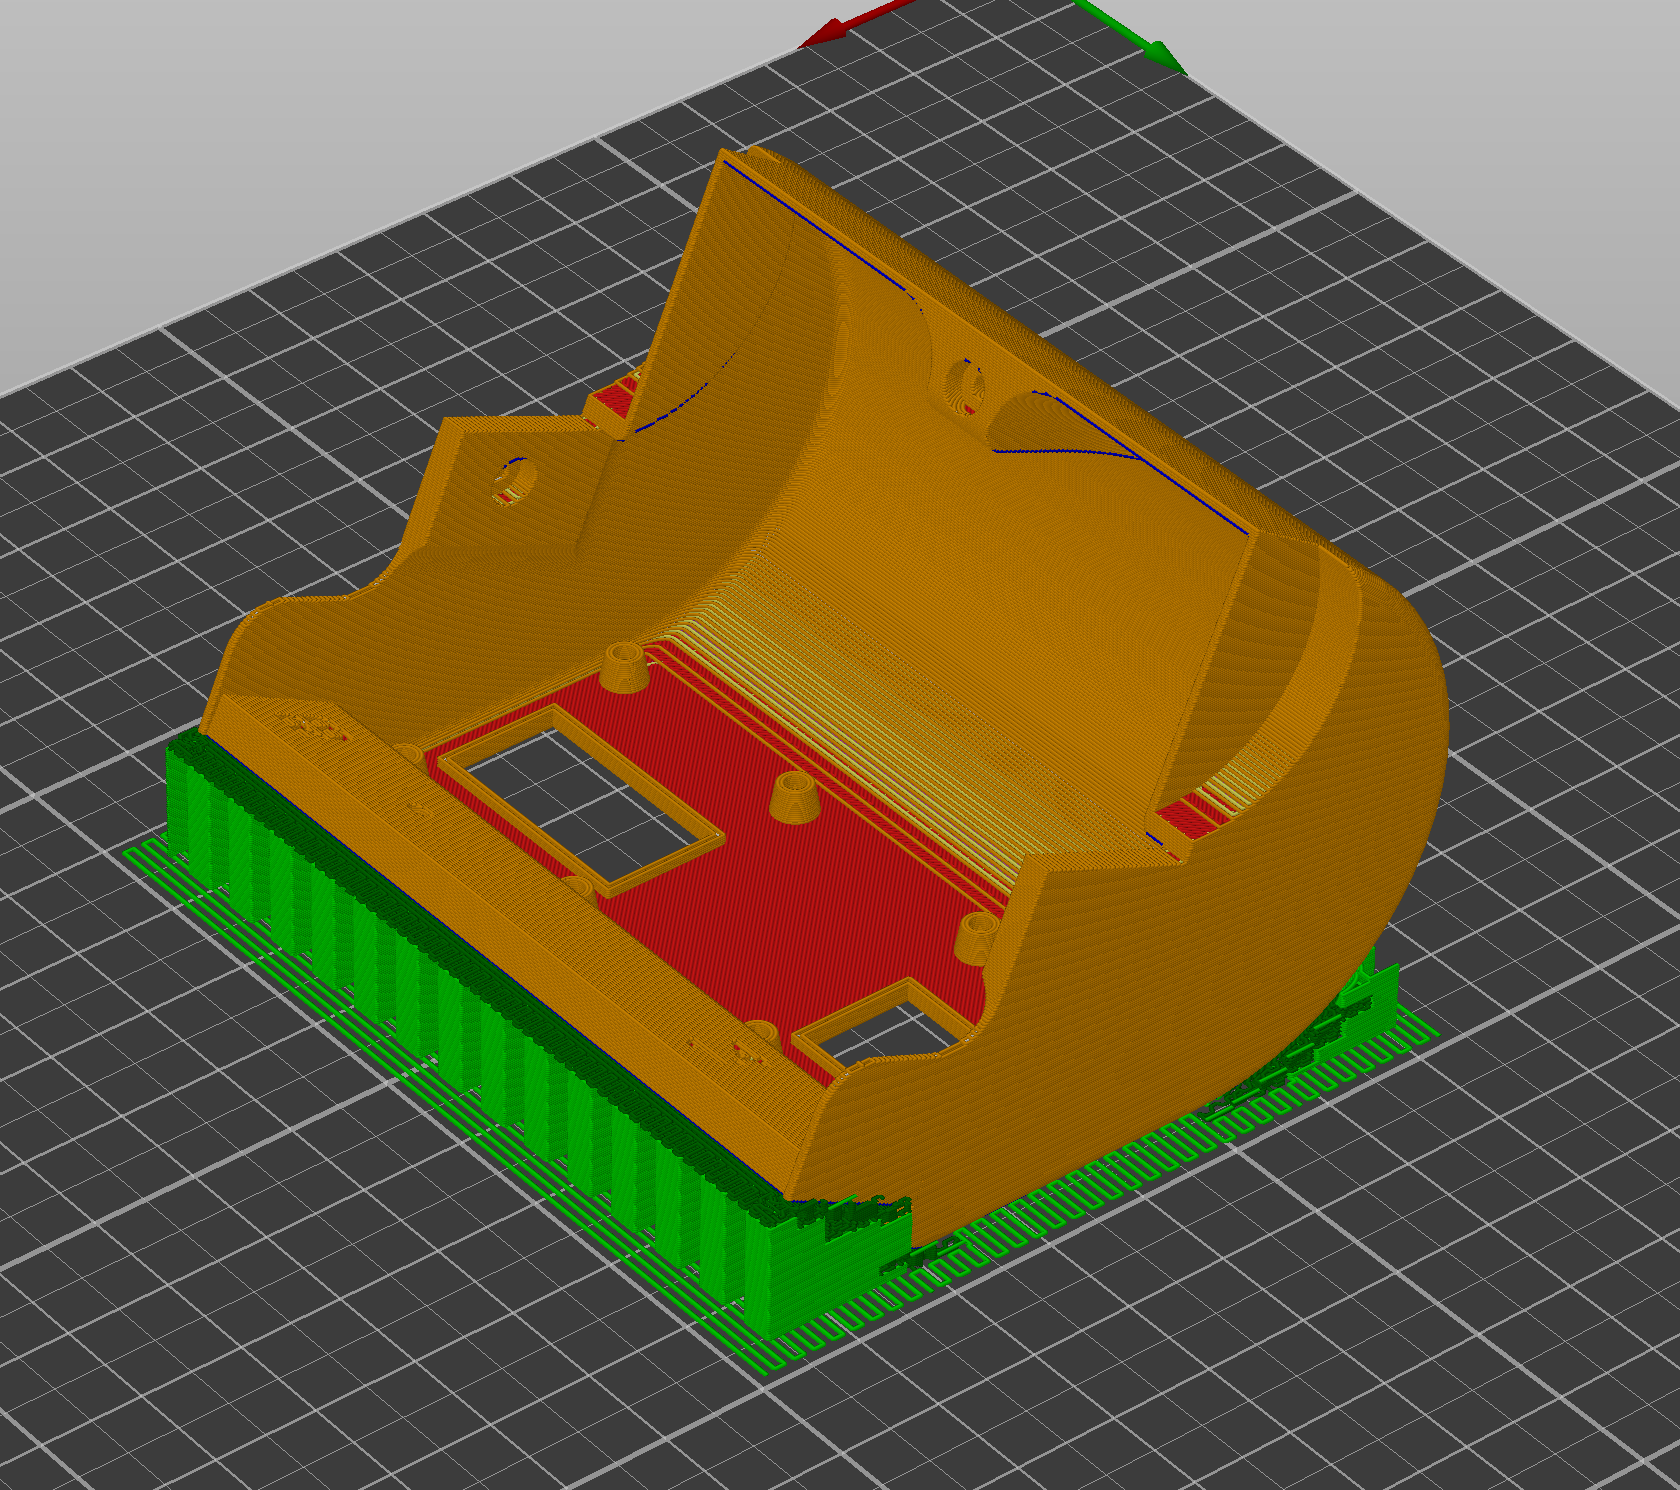
I suggest orienting the STL following this picture and setup with:
- Supports: Disable
I suggest orienting the STL following this picture and setup with:
- Supports: Disable
Assembly
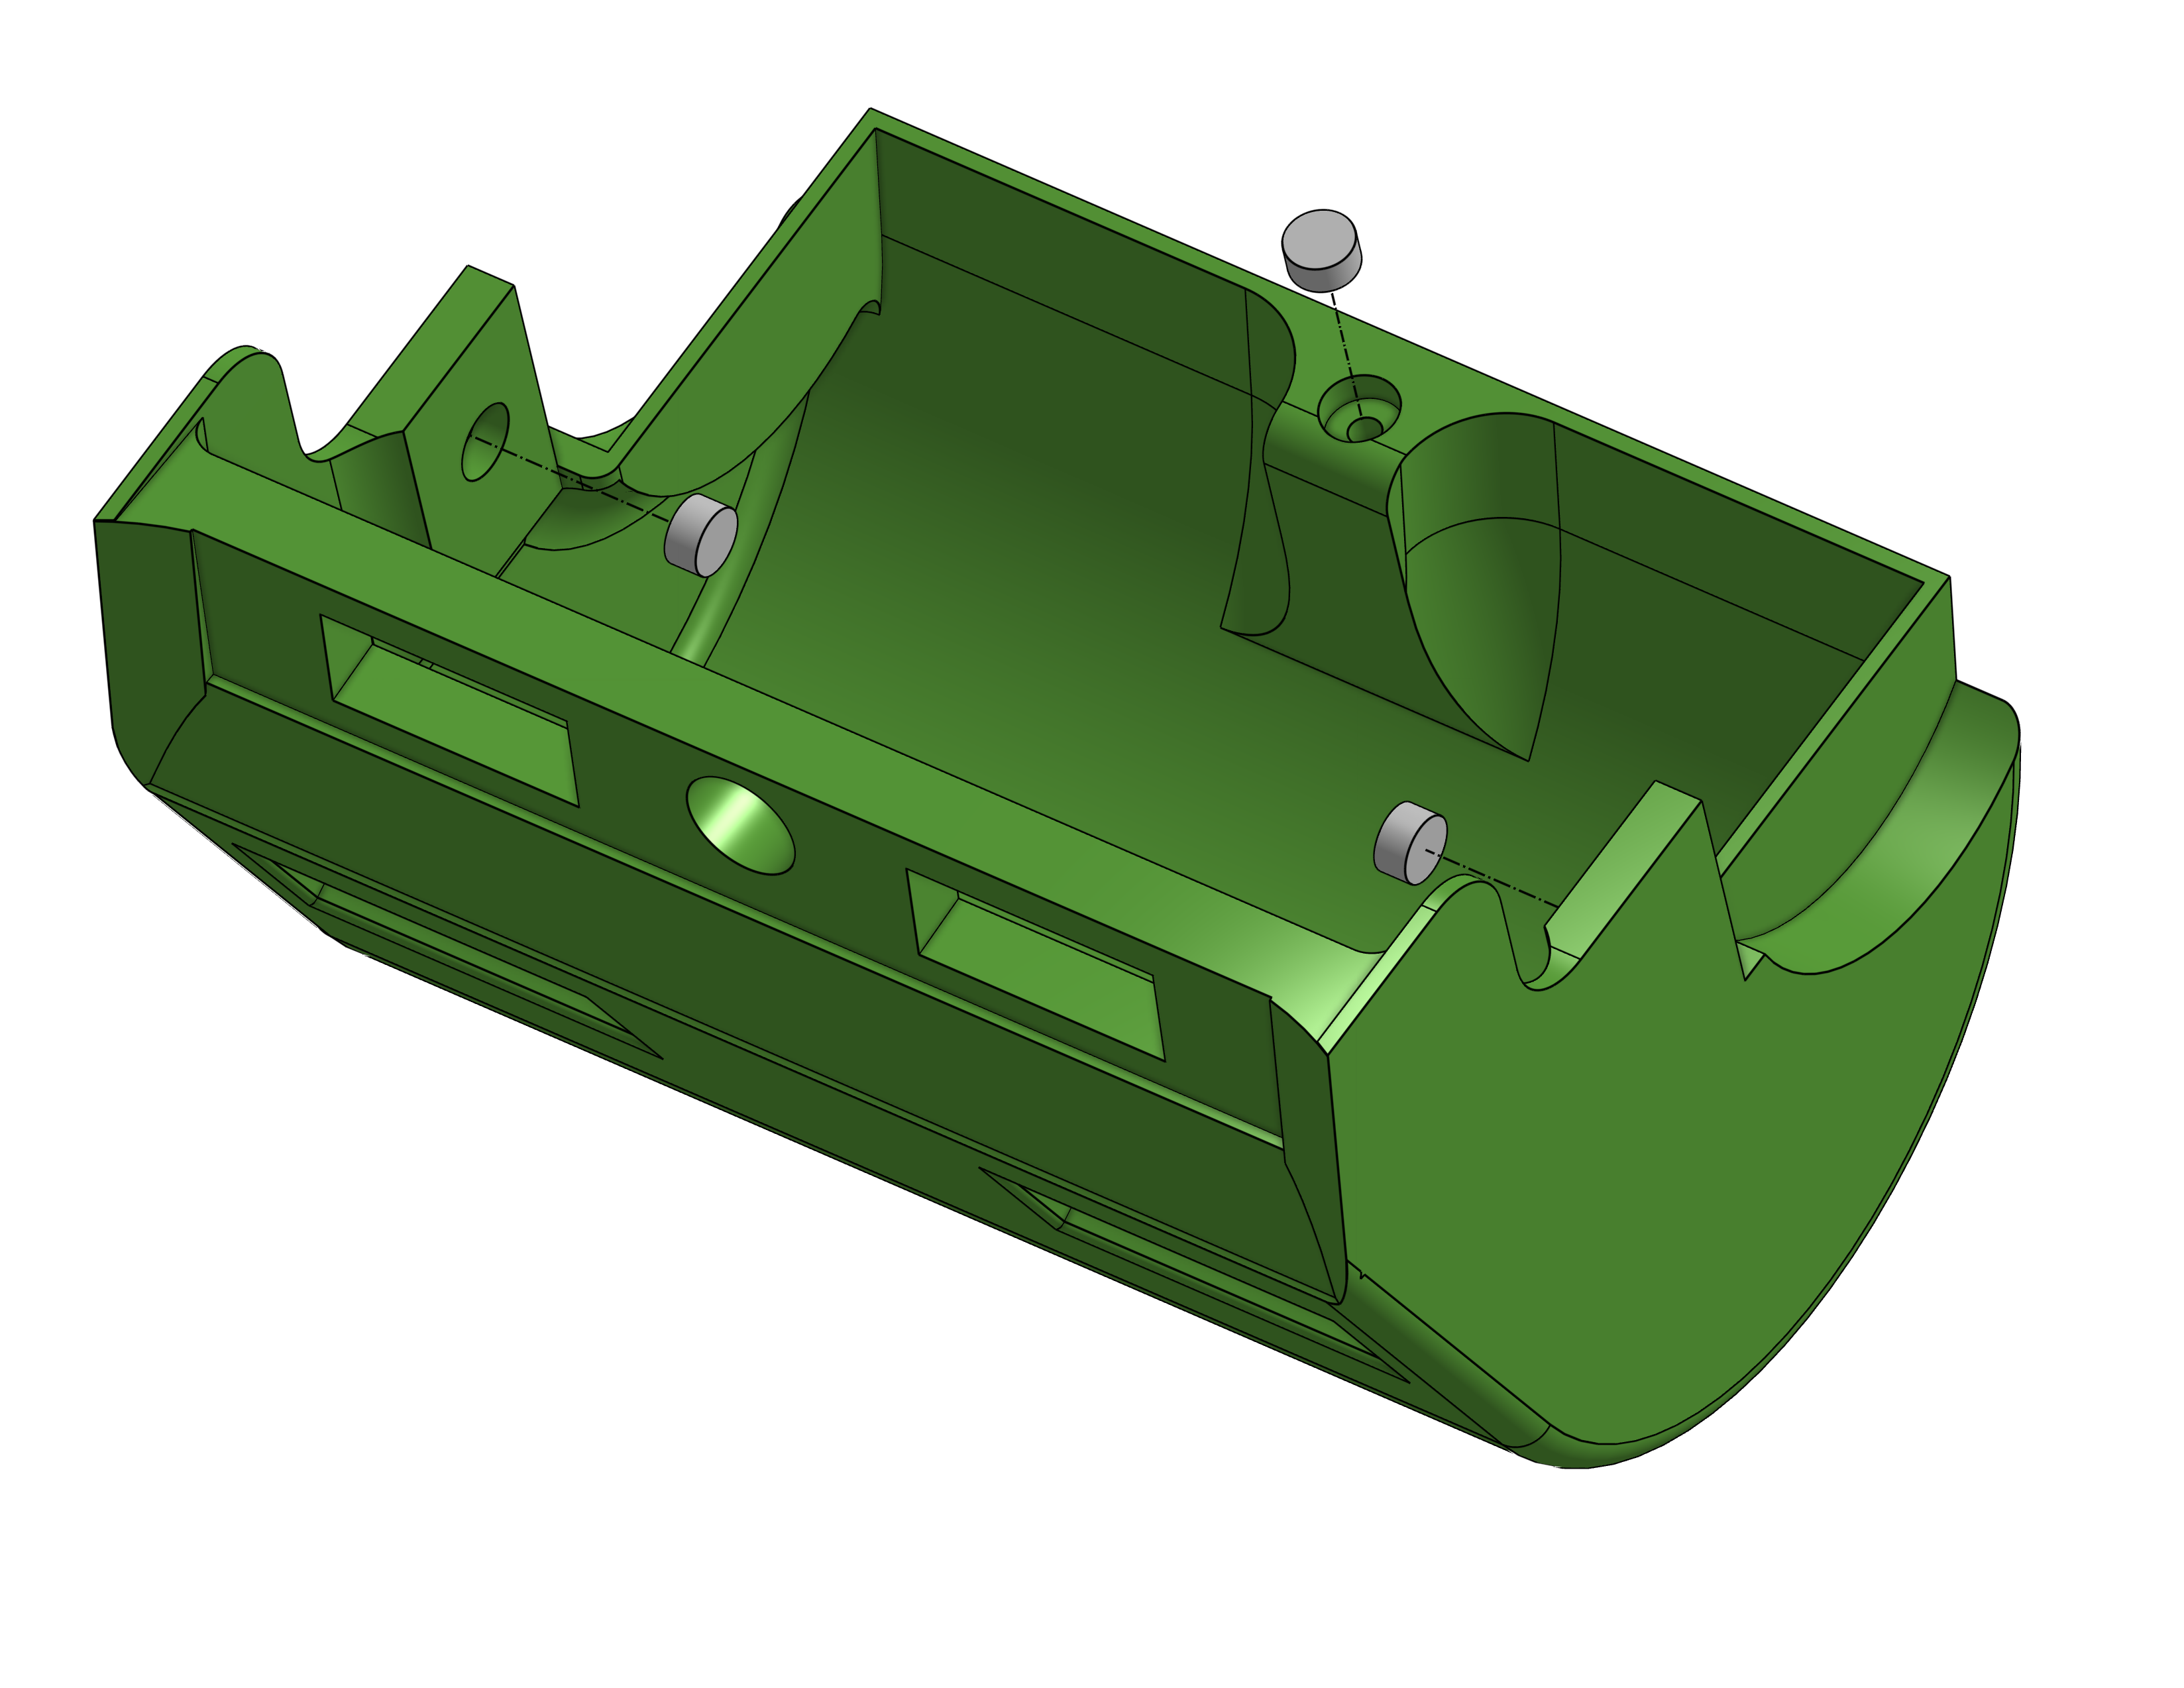
Components to pick up
| Quantity | Part |
|---|---|
| 1 | cover.stl |
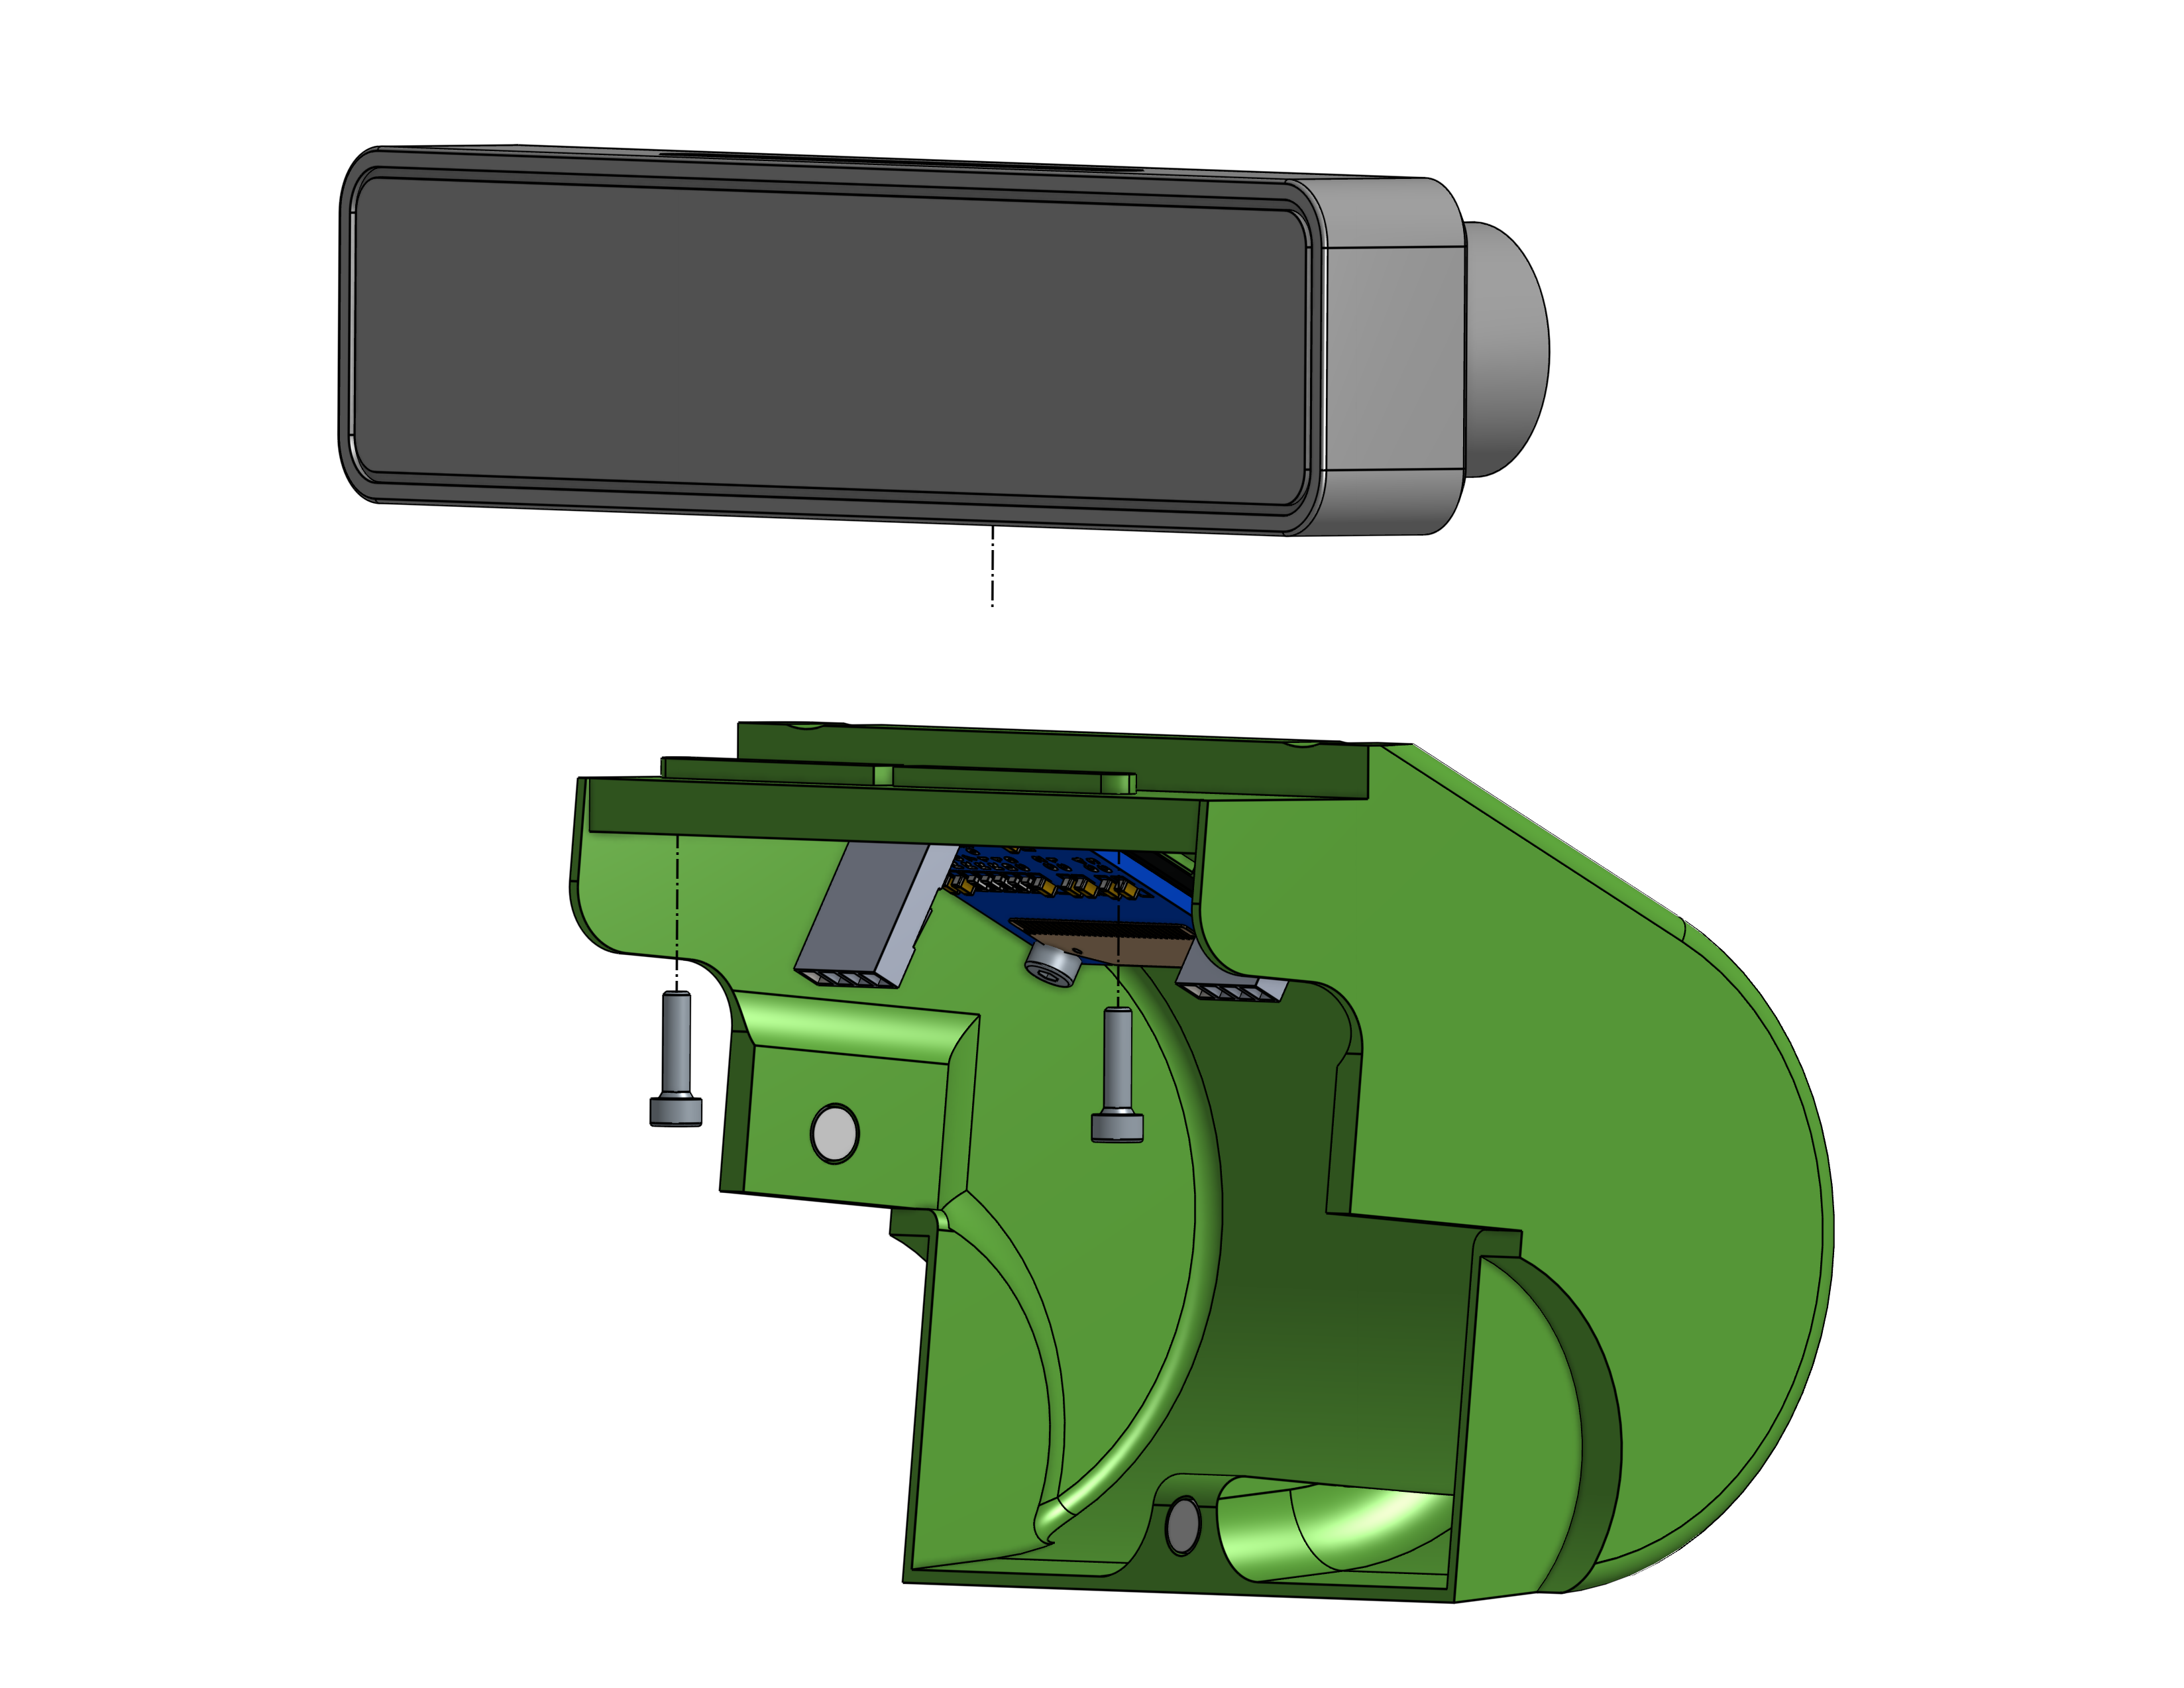
| 1 | PI cam v2 |
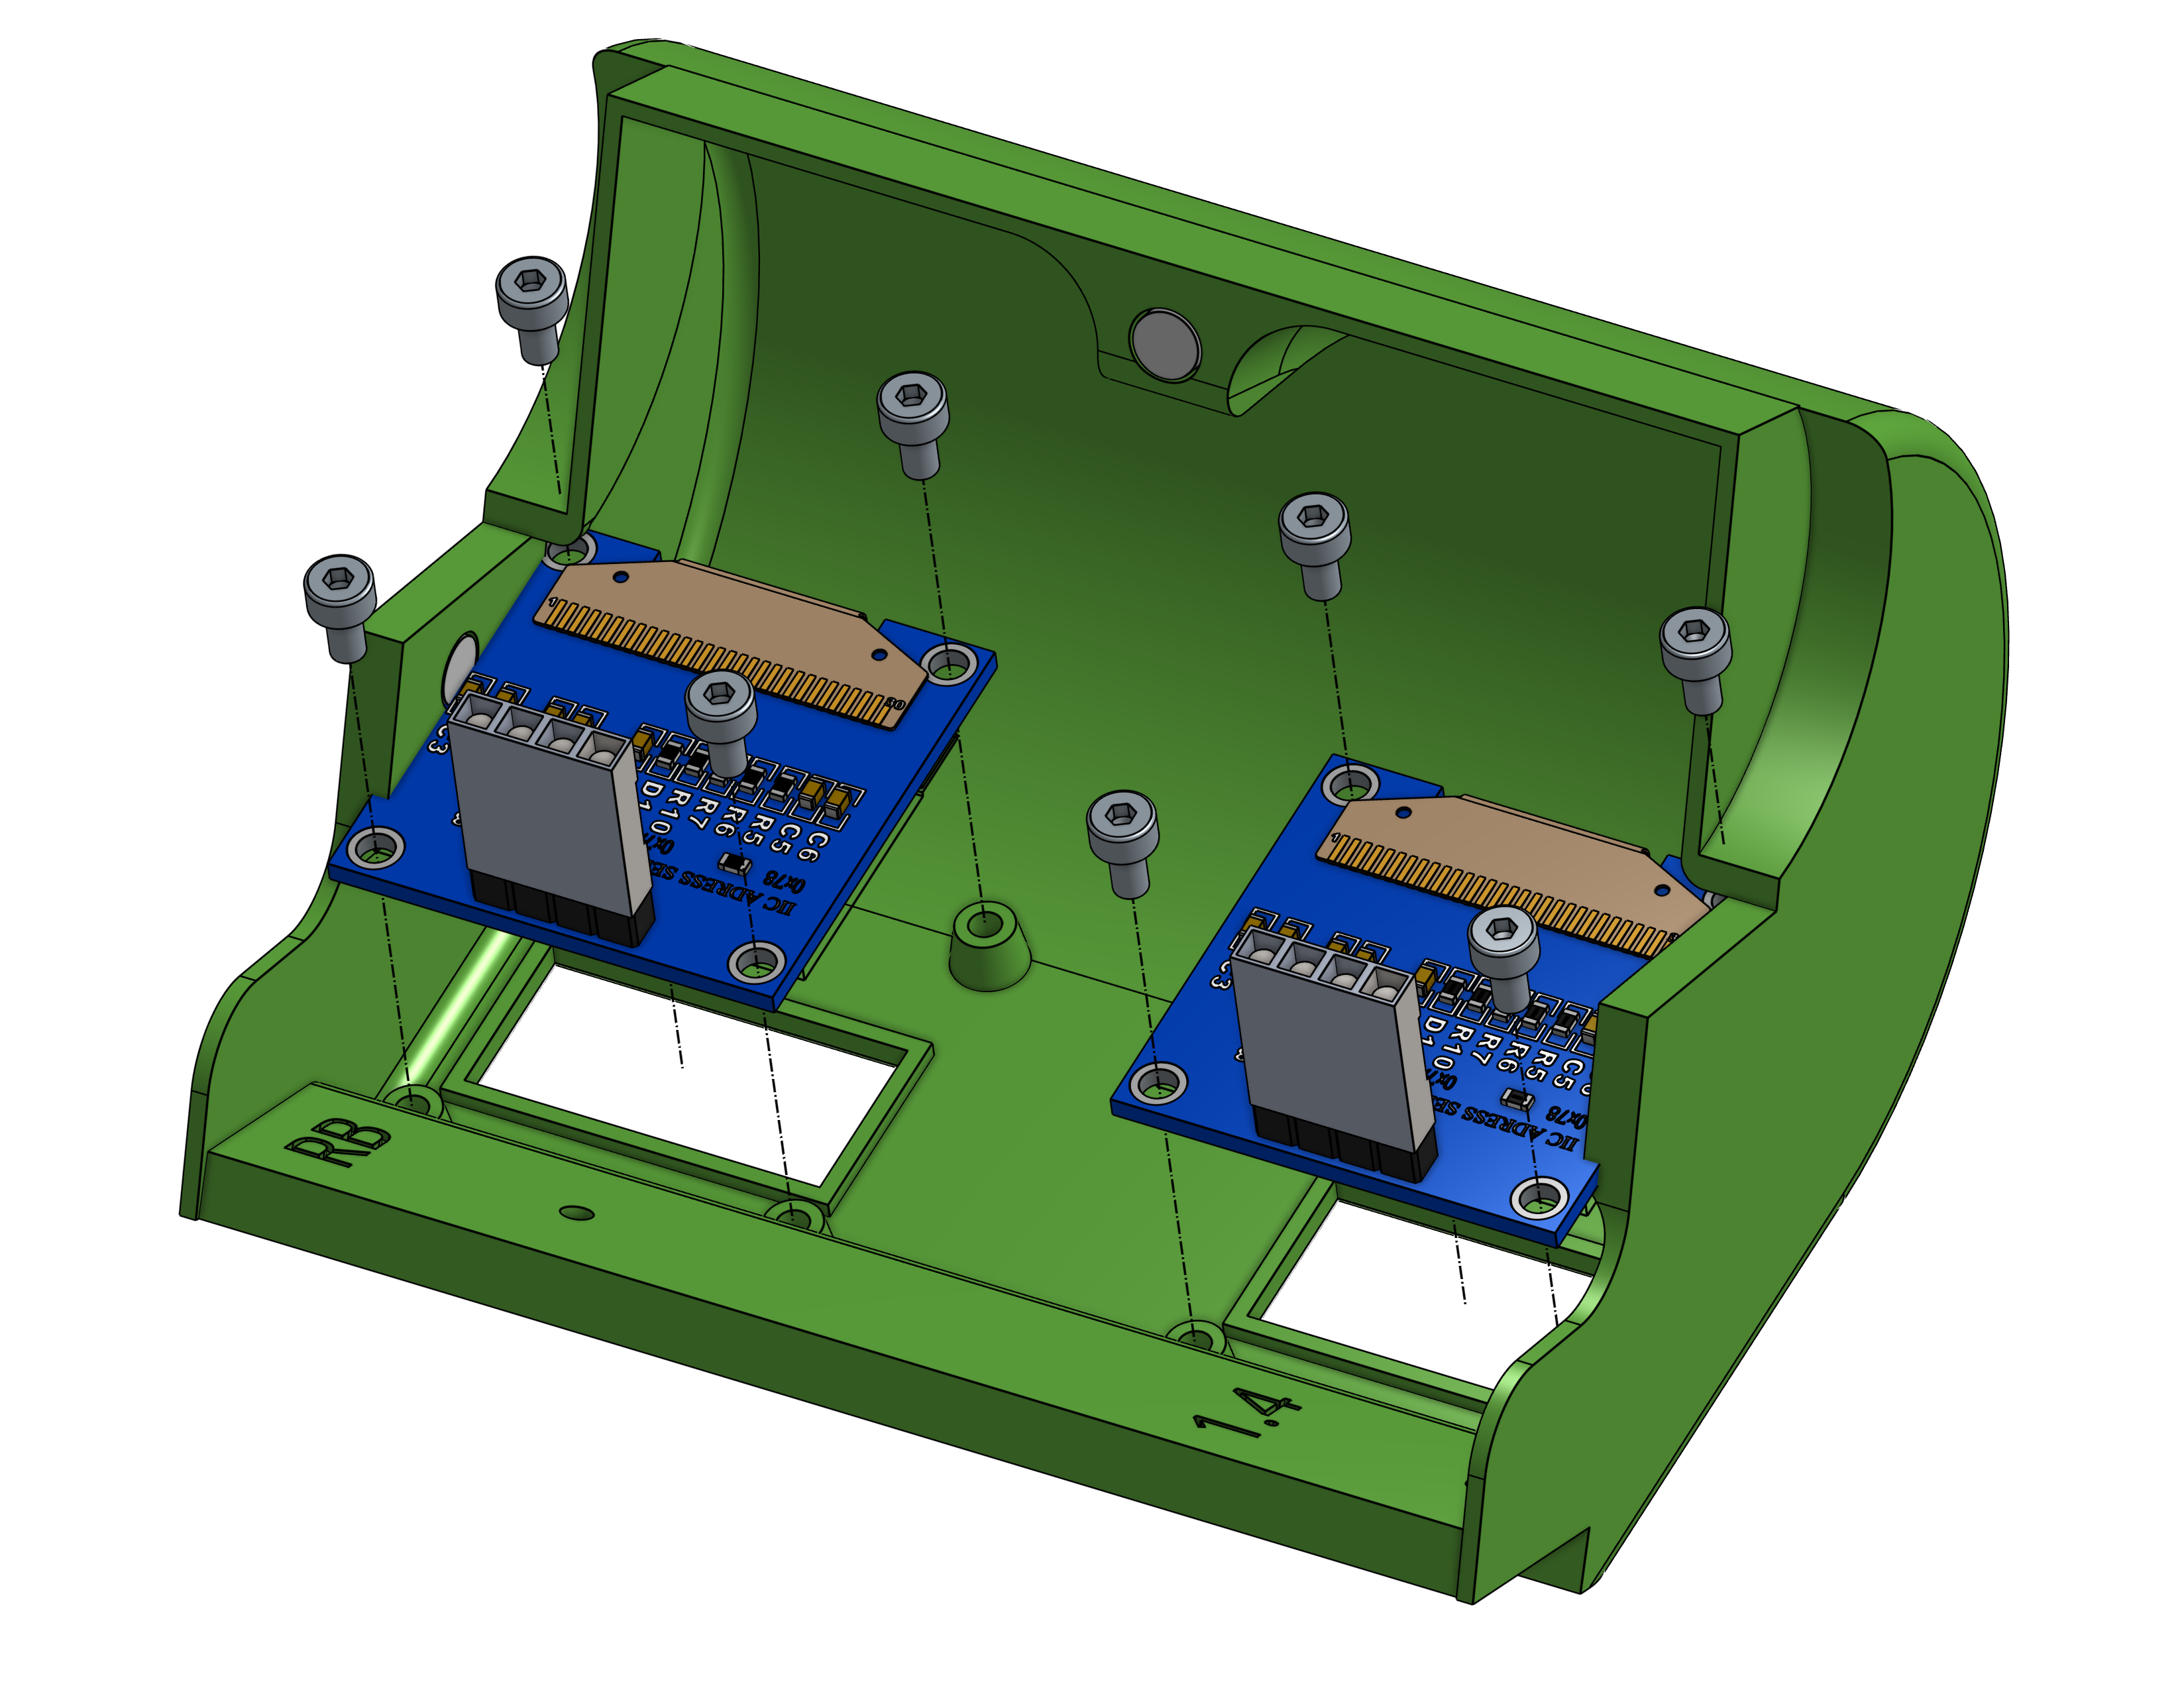
| 2 | oLED display - 128x64px |
| 12 | Hex M2 4mm |
| 3 | magnet 4x2mm |
![]() Hint If you don’t want to use the magnets, but the screw, follow the optional guide Screw Assembly
Hint If you don’t want to use the magnets, but the screw, follow the optional guide Screw Assembly
![]() Hint To simplify the assembly, dry-fit of all screws after 3D print
Hint To simplify the assembly, dry-fit of all screws after 3D print
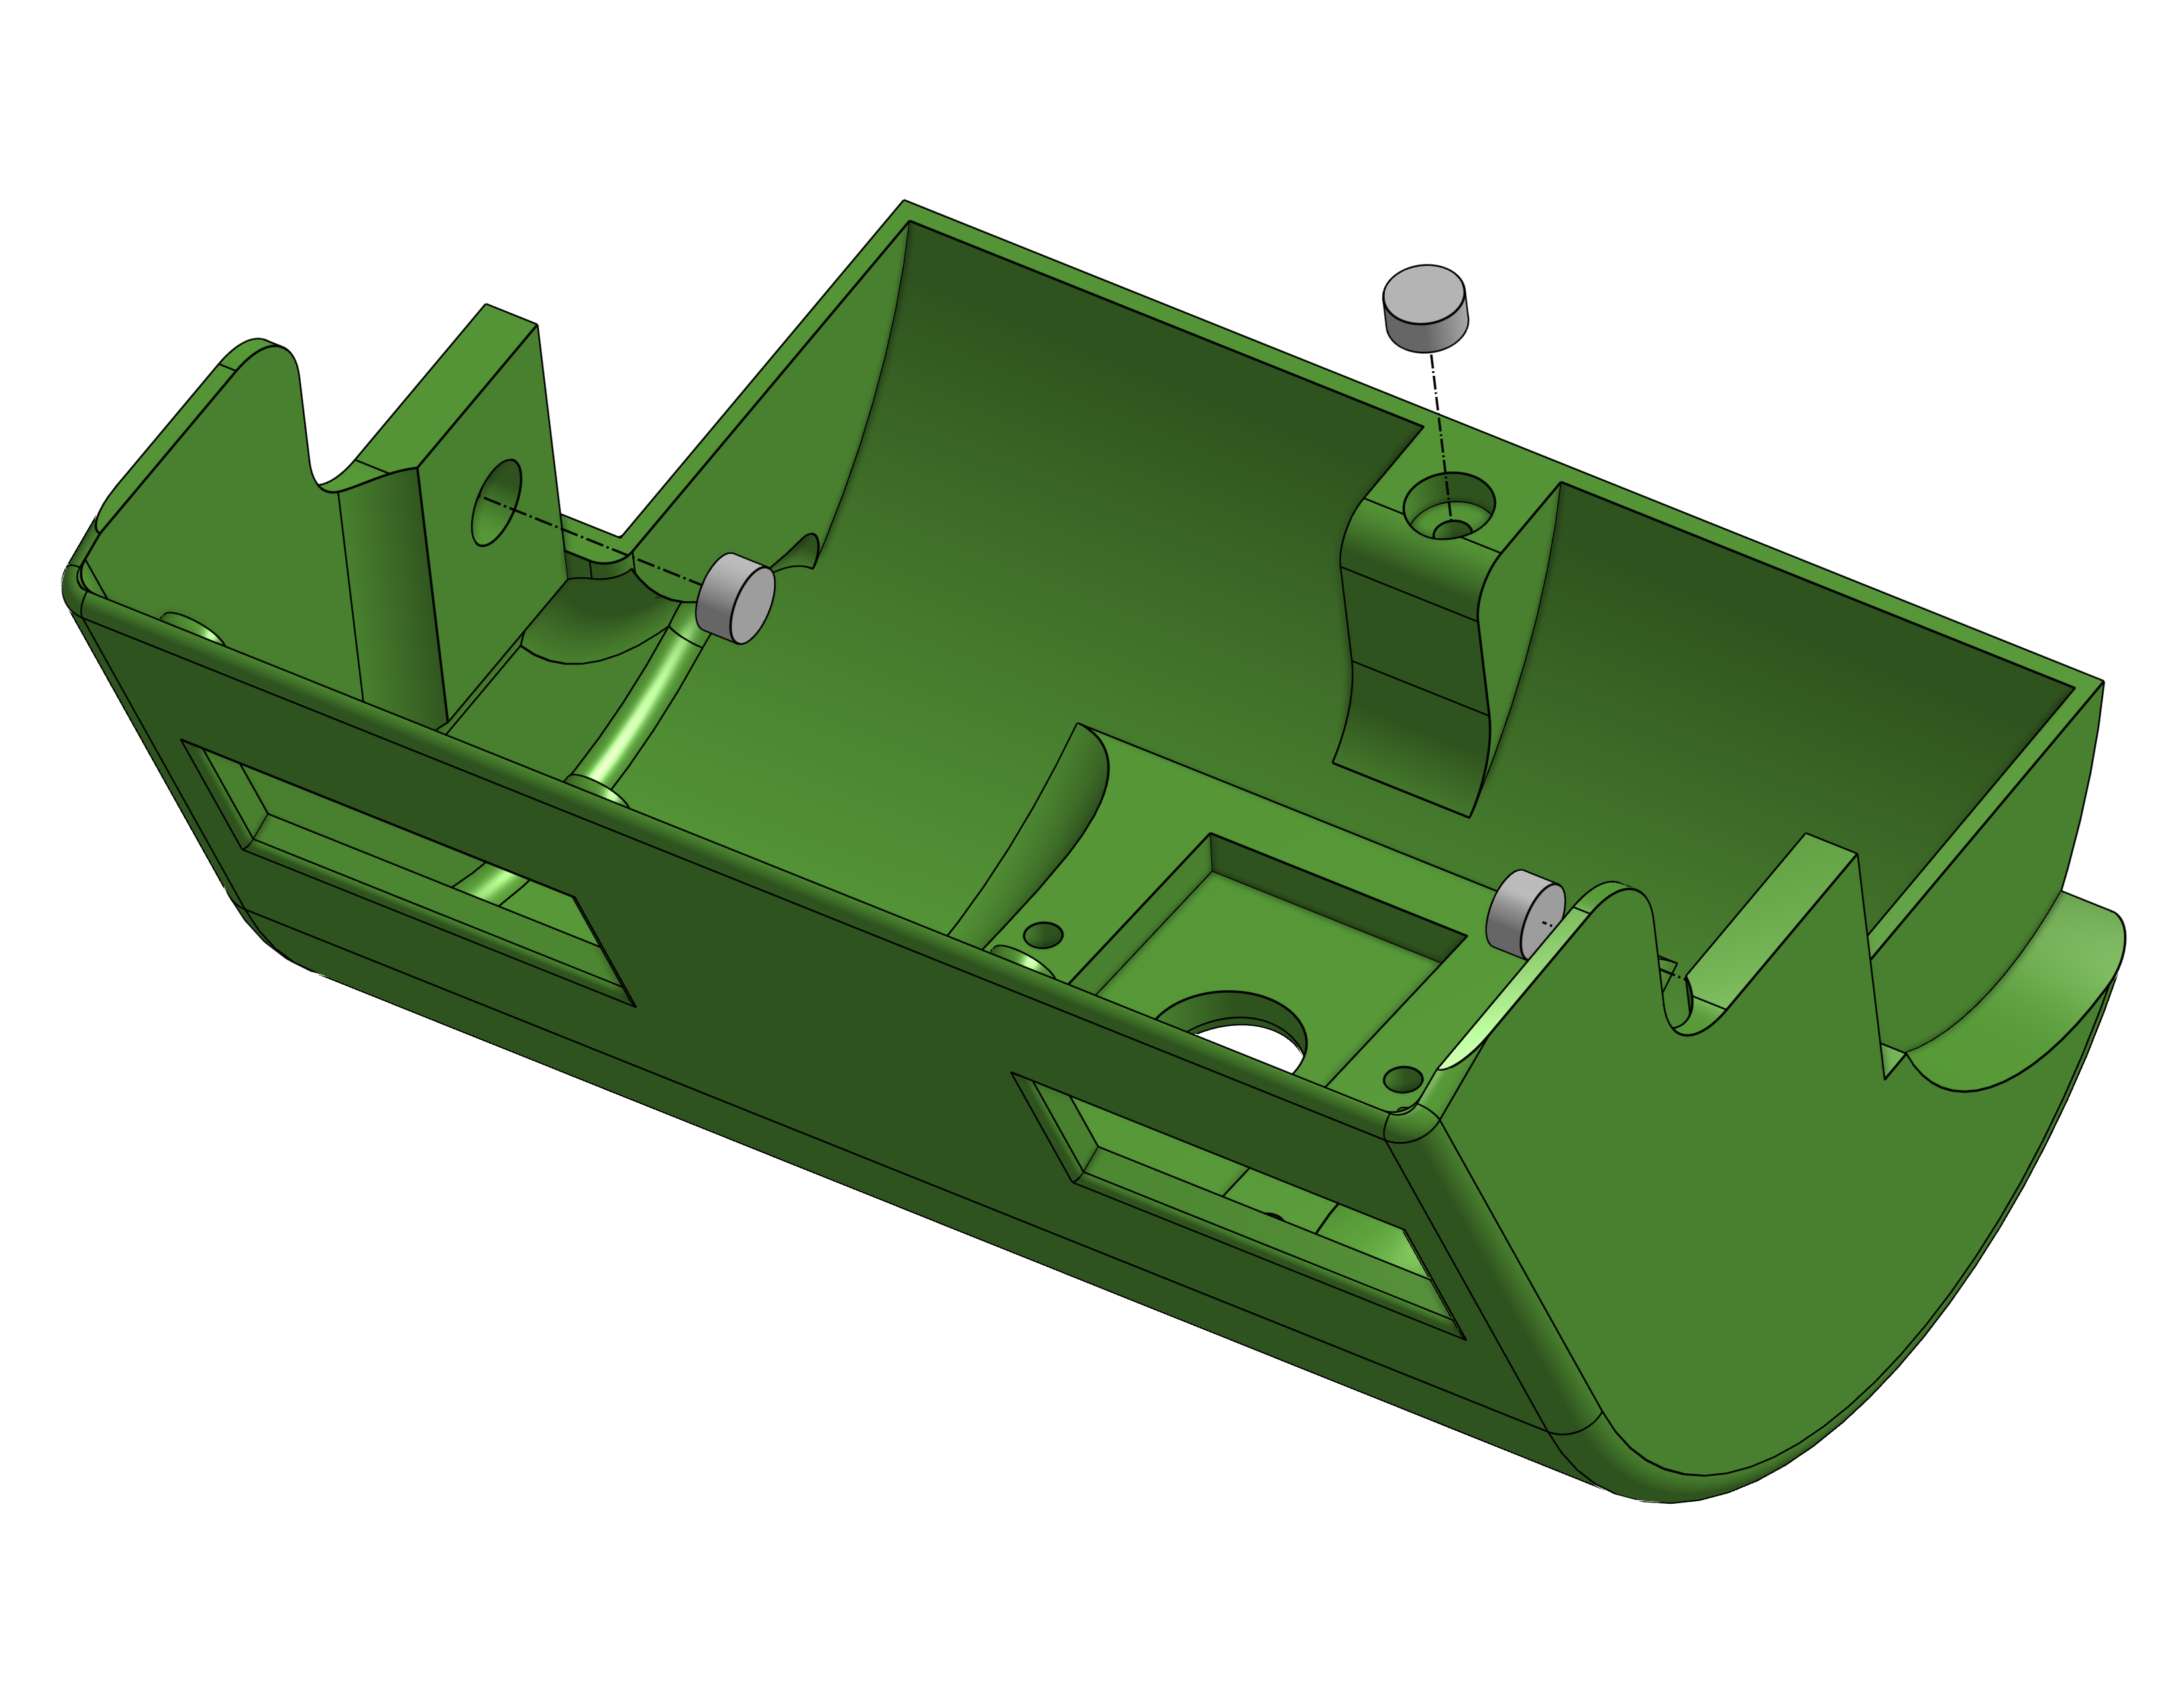
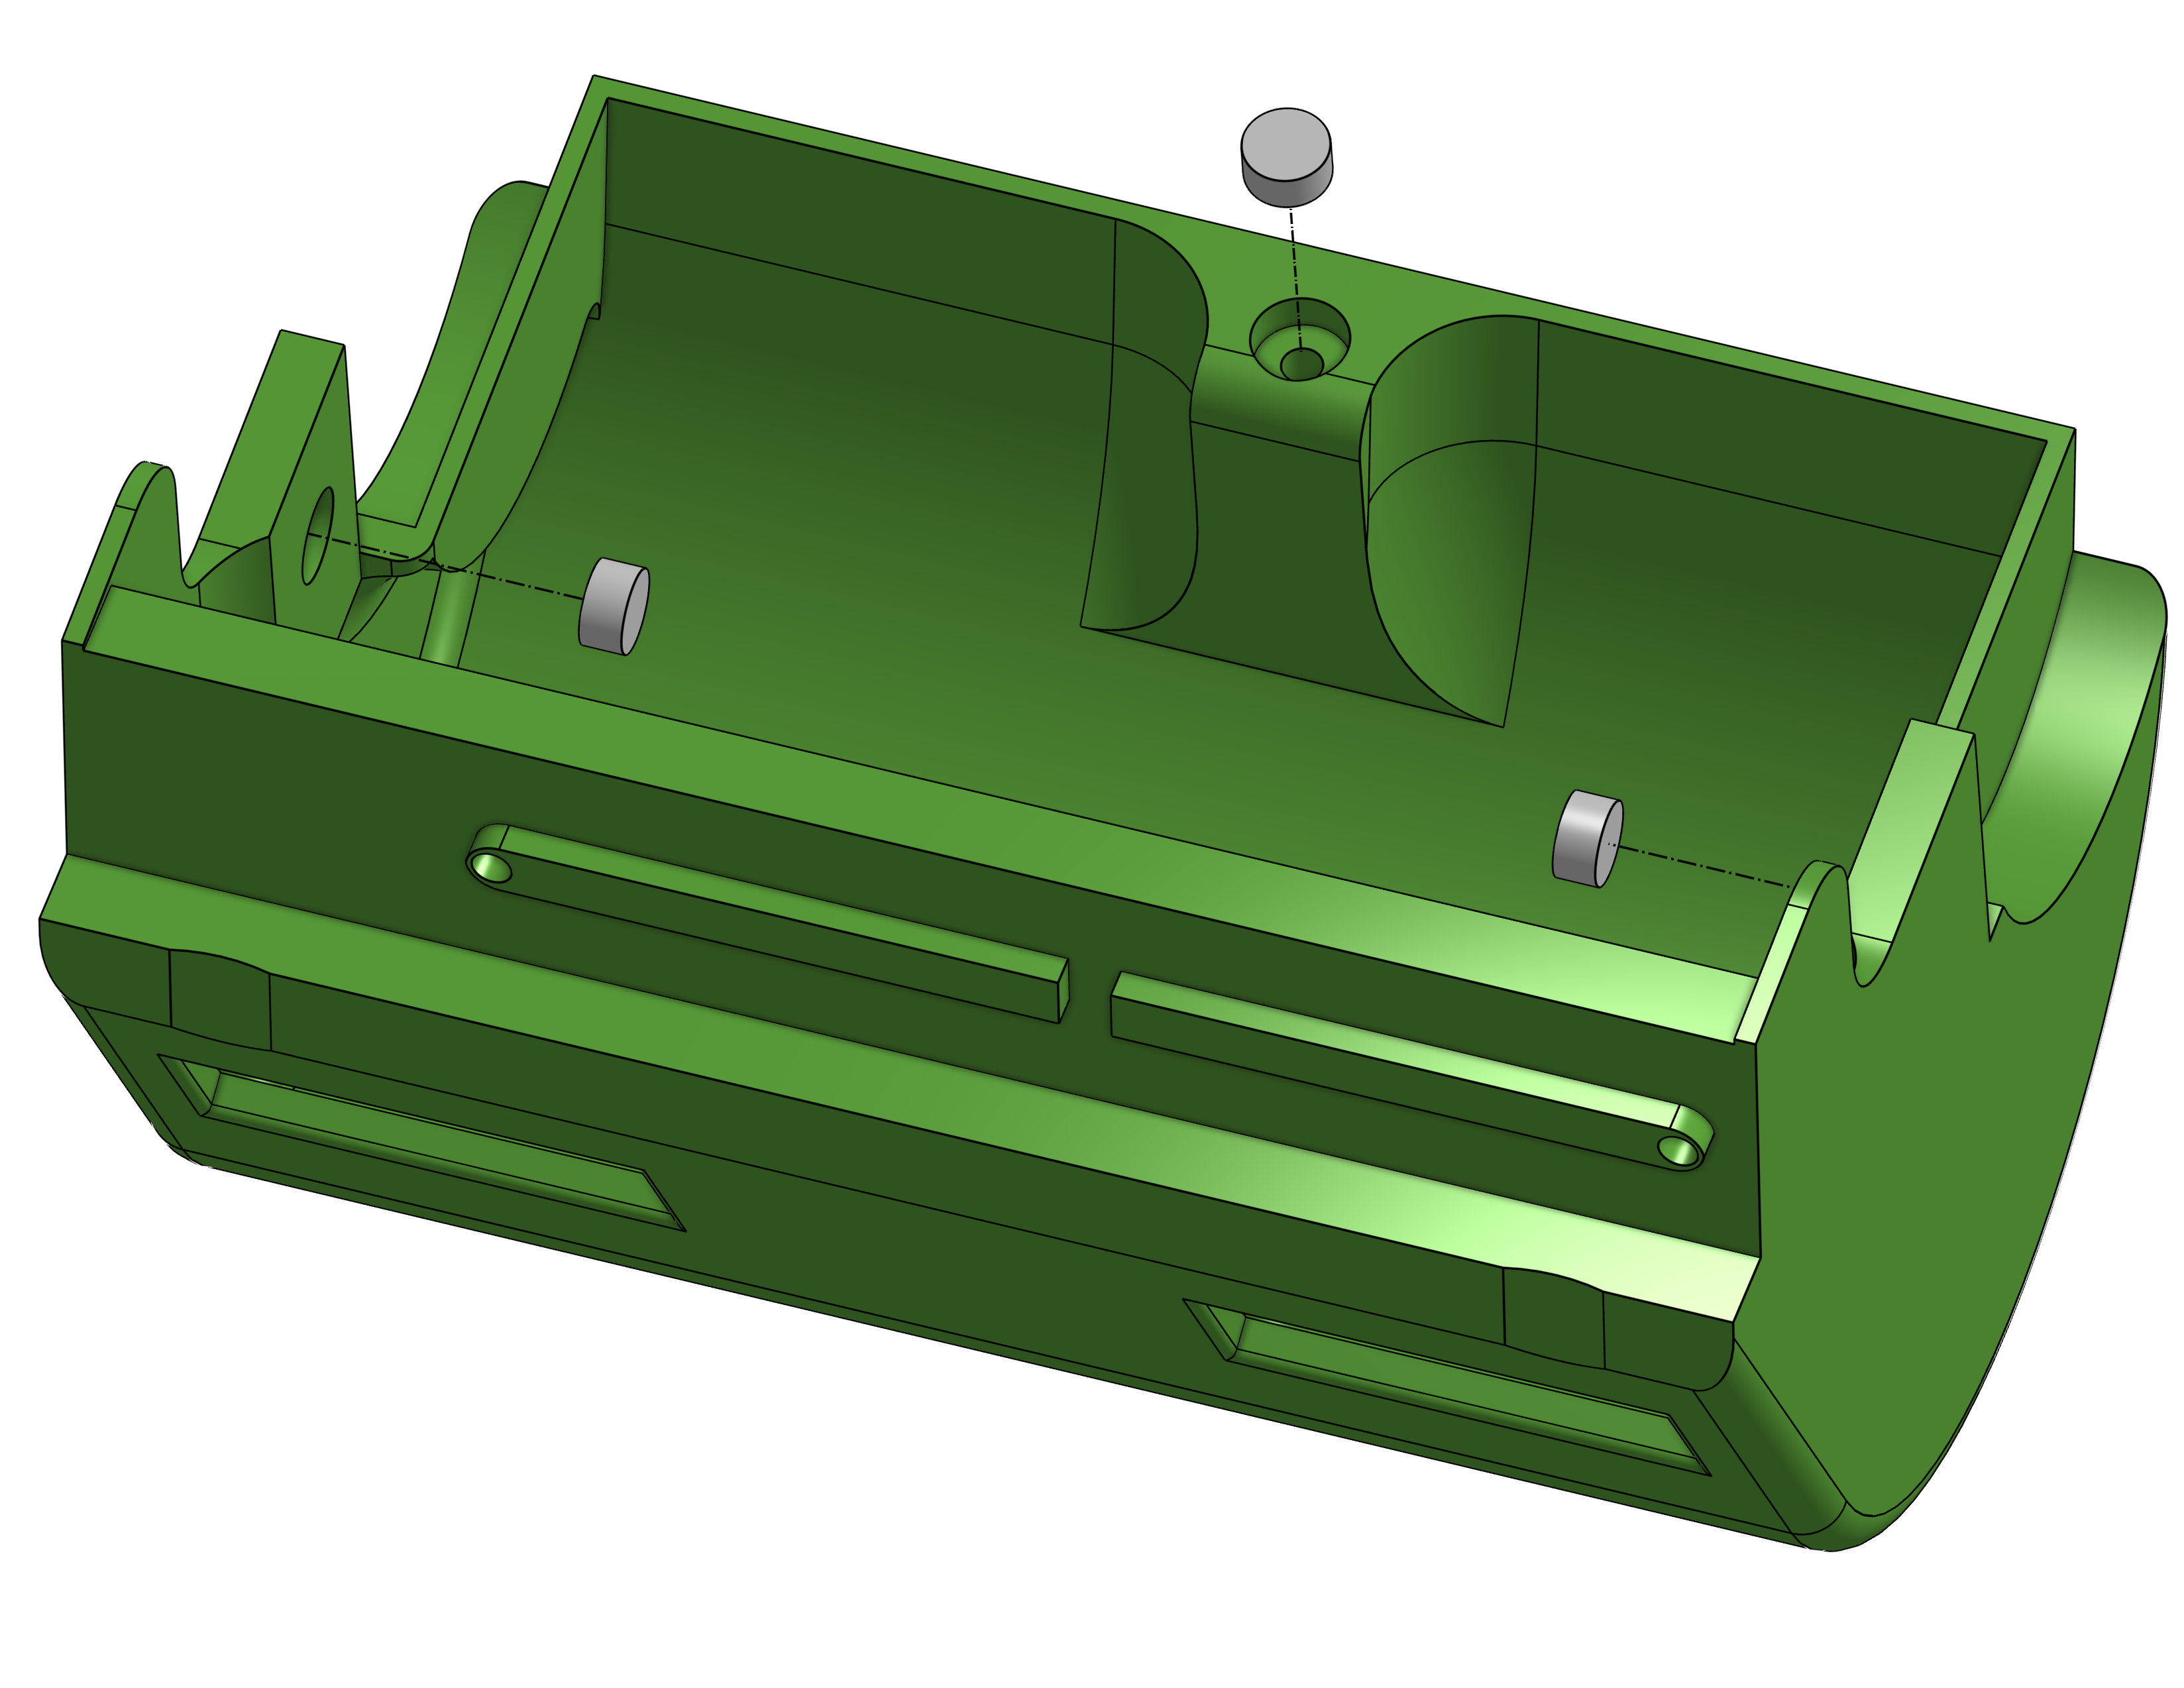
![]() WARNING Check the magnets orientation before to stick it!
WARNING Check the magnets orientation before to stick it!
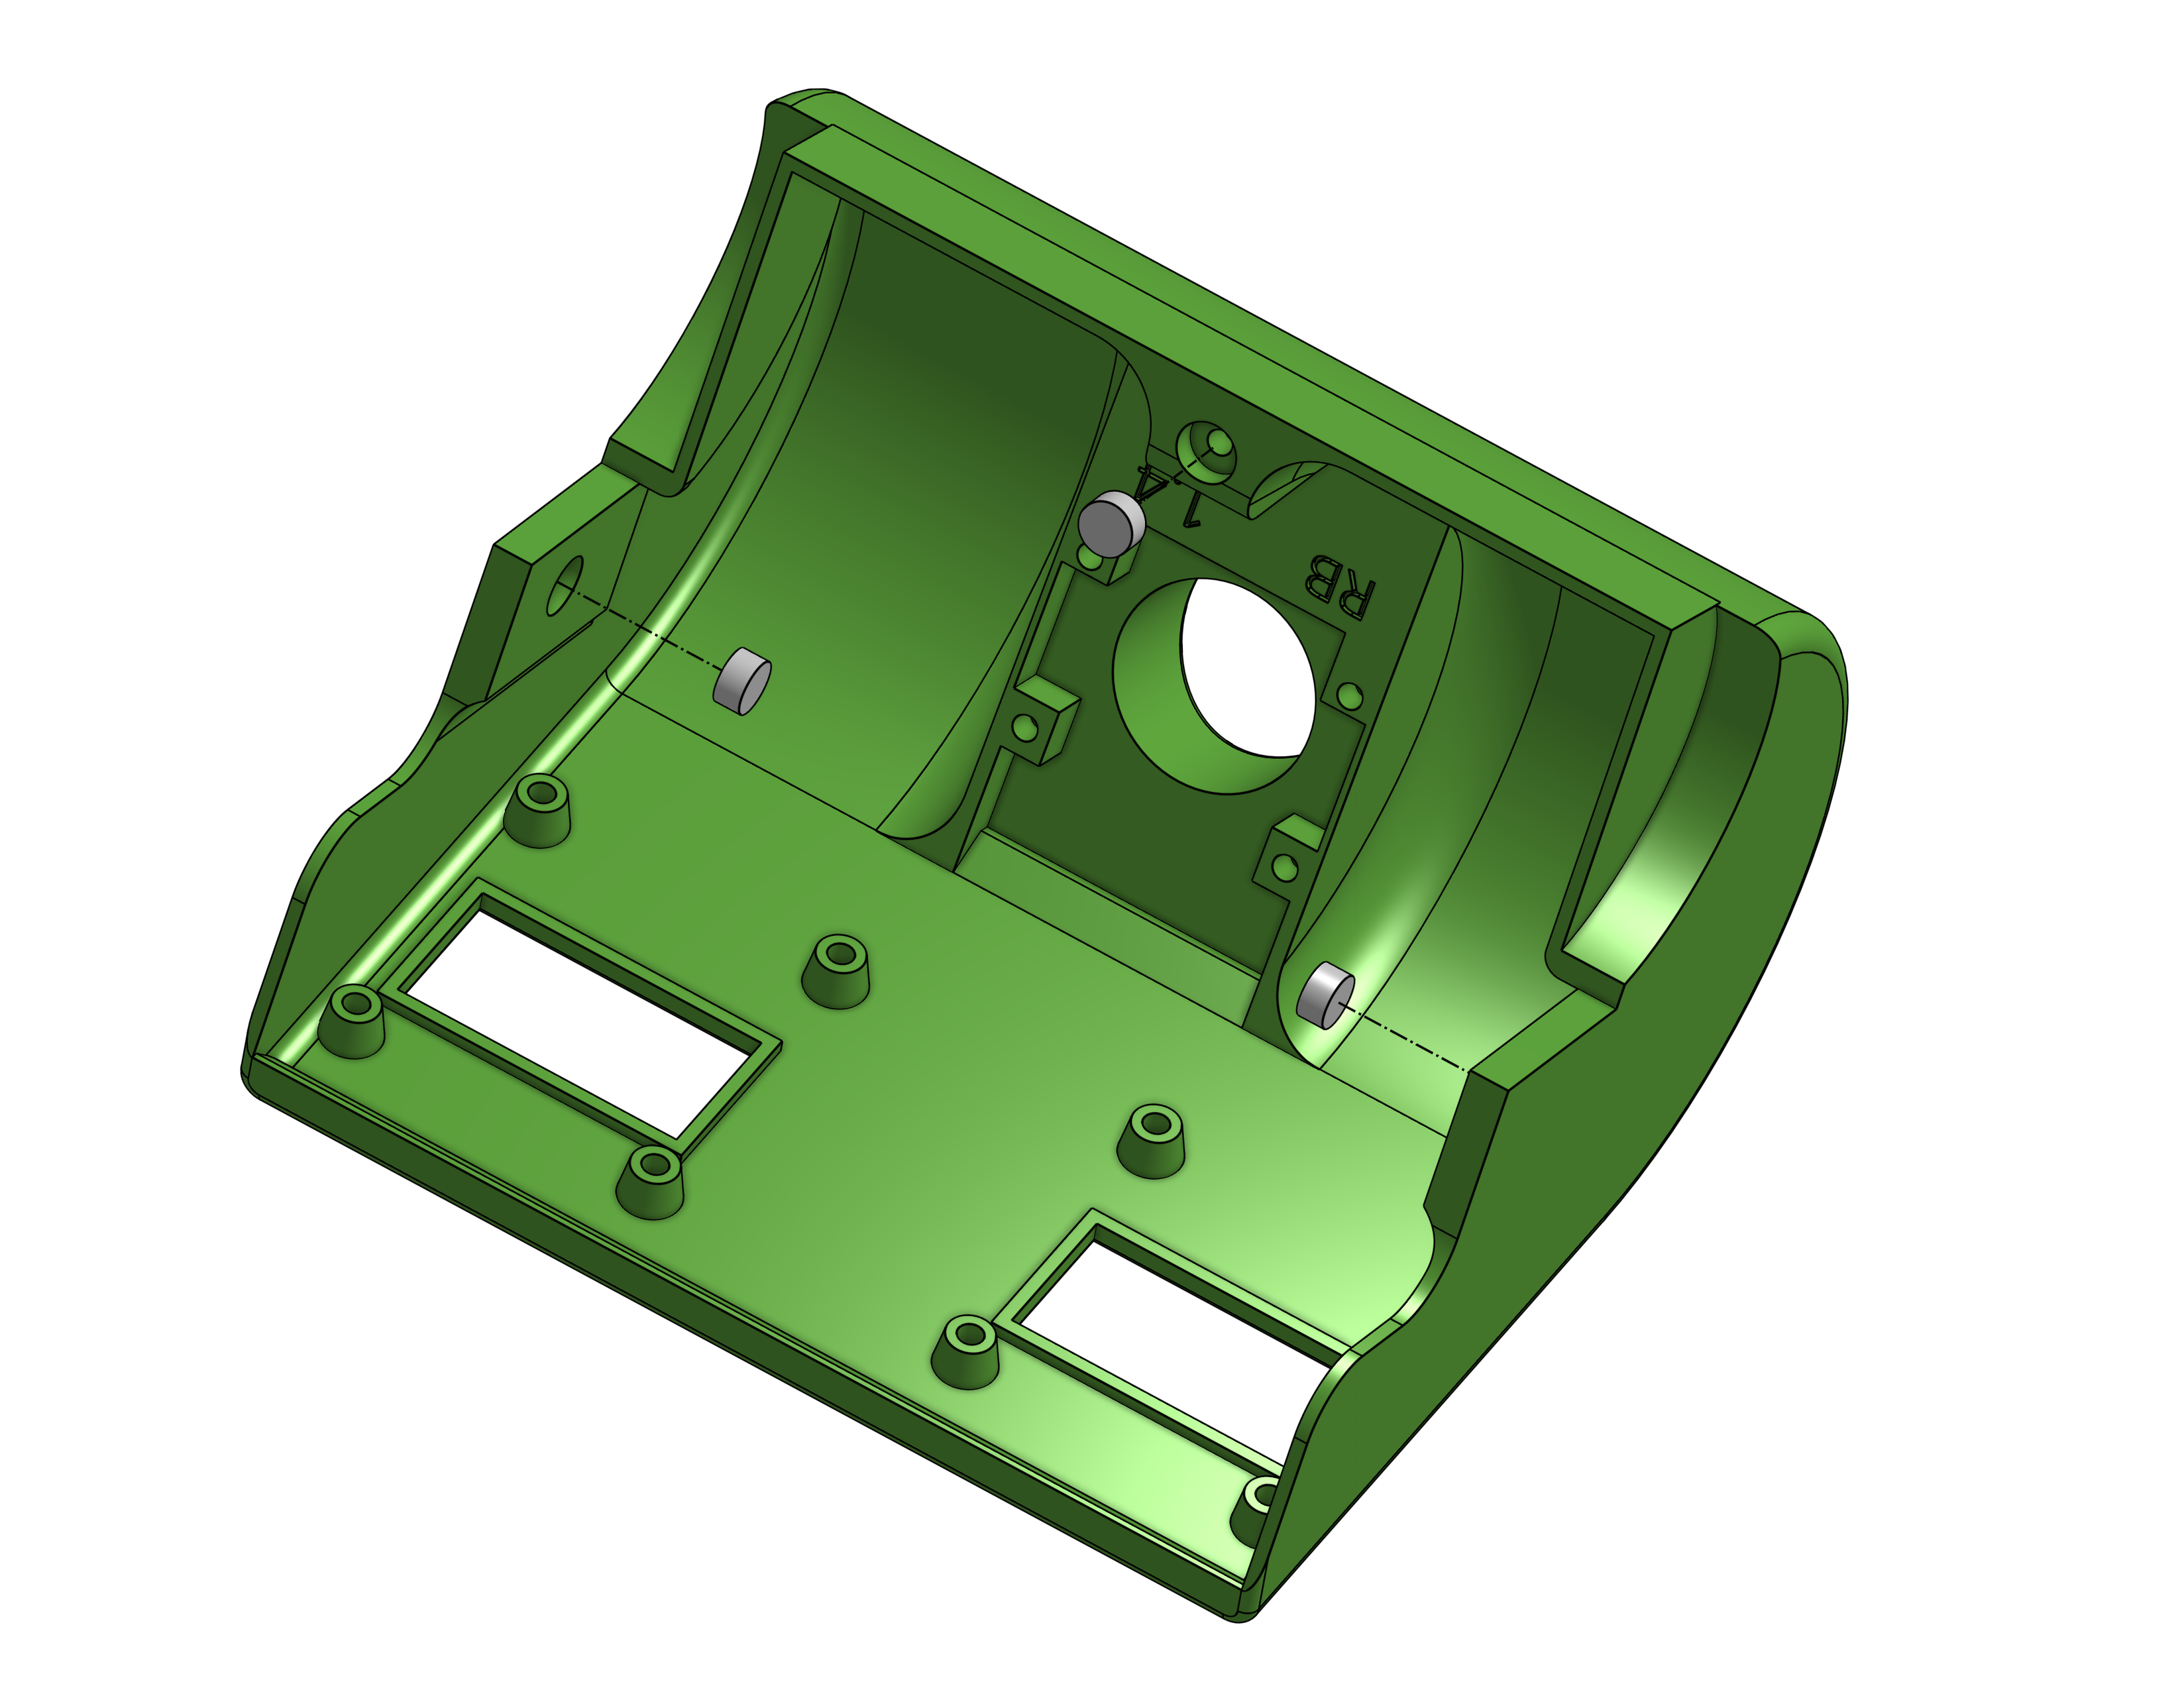
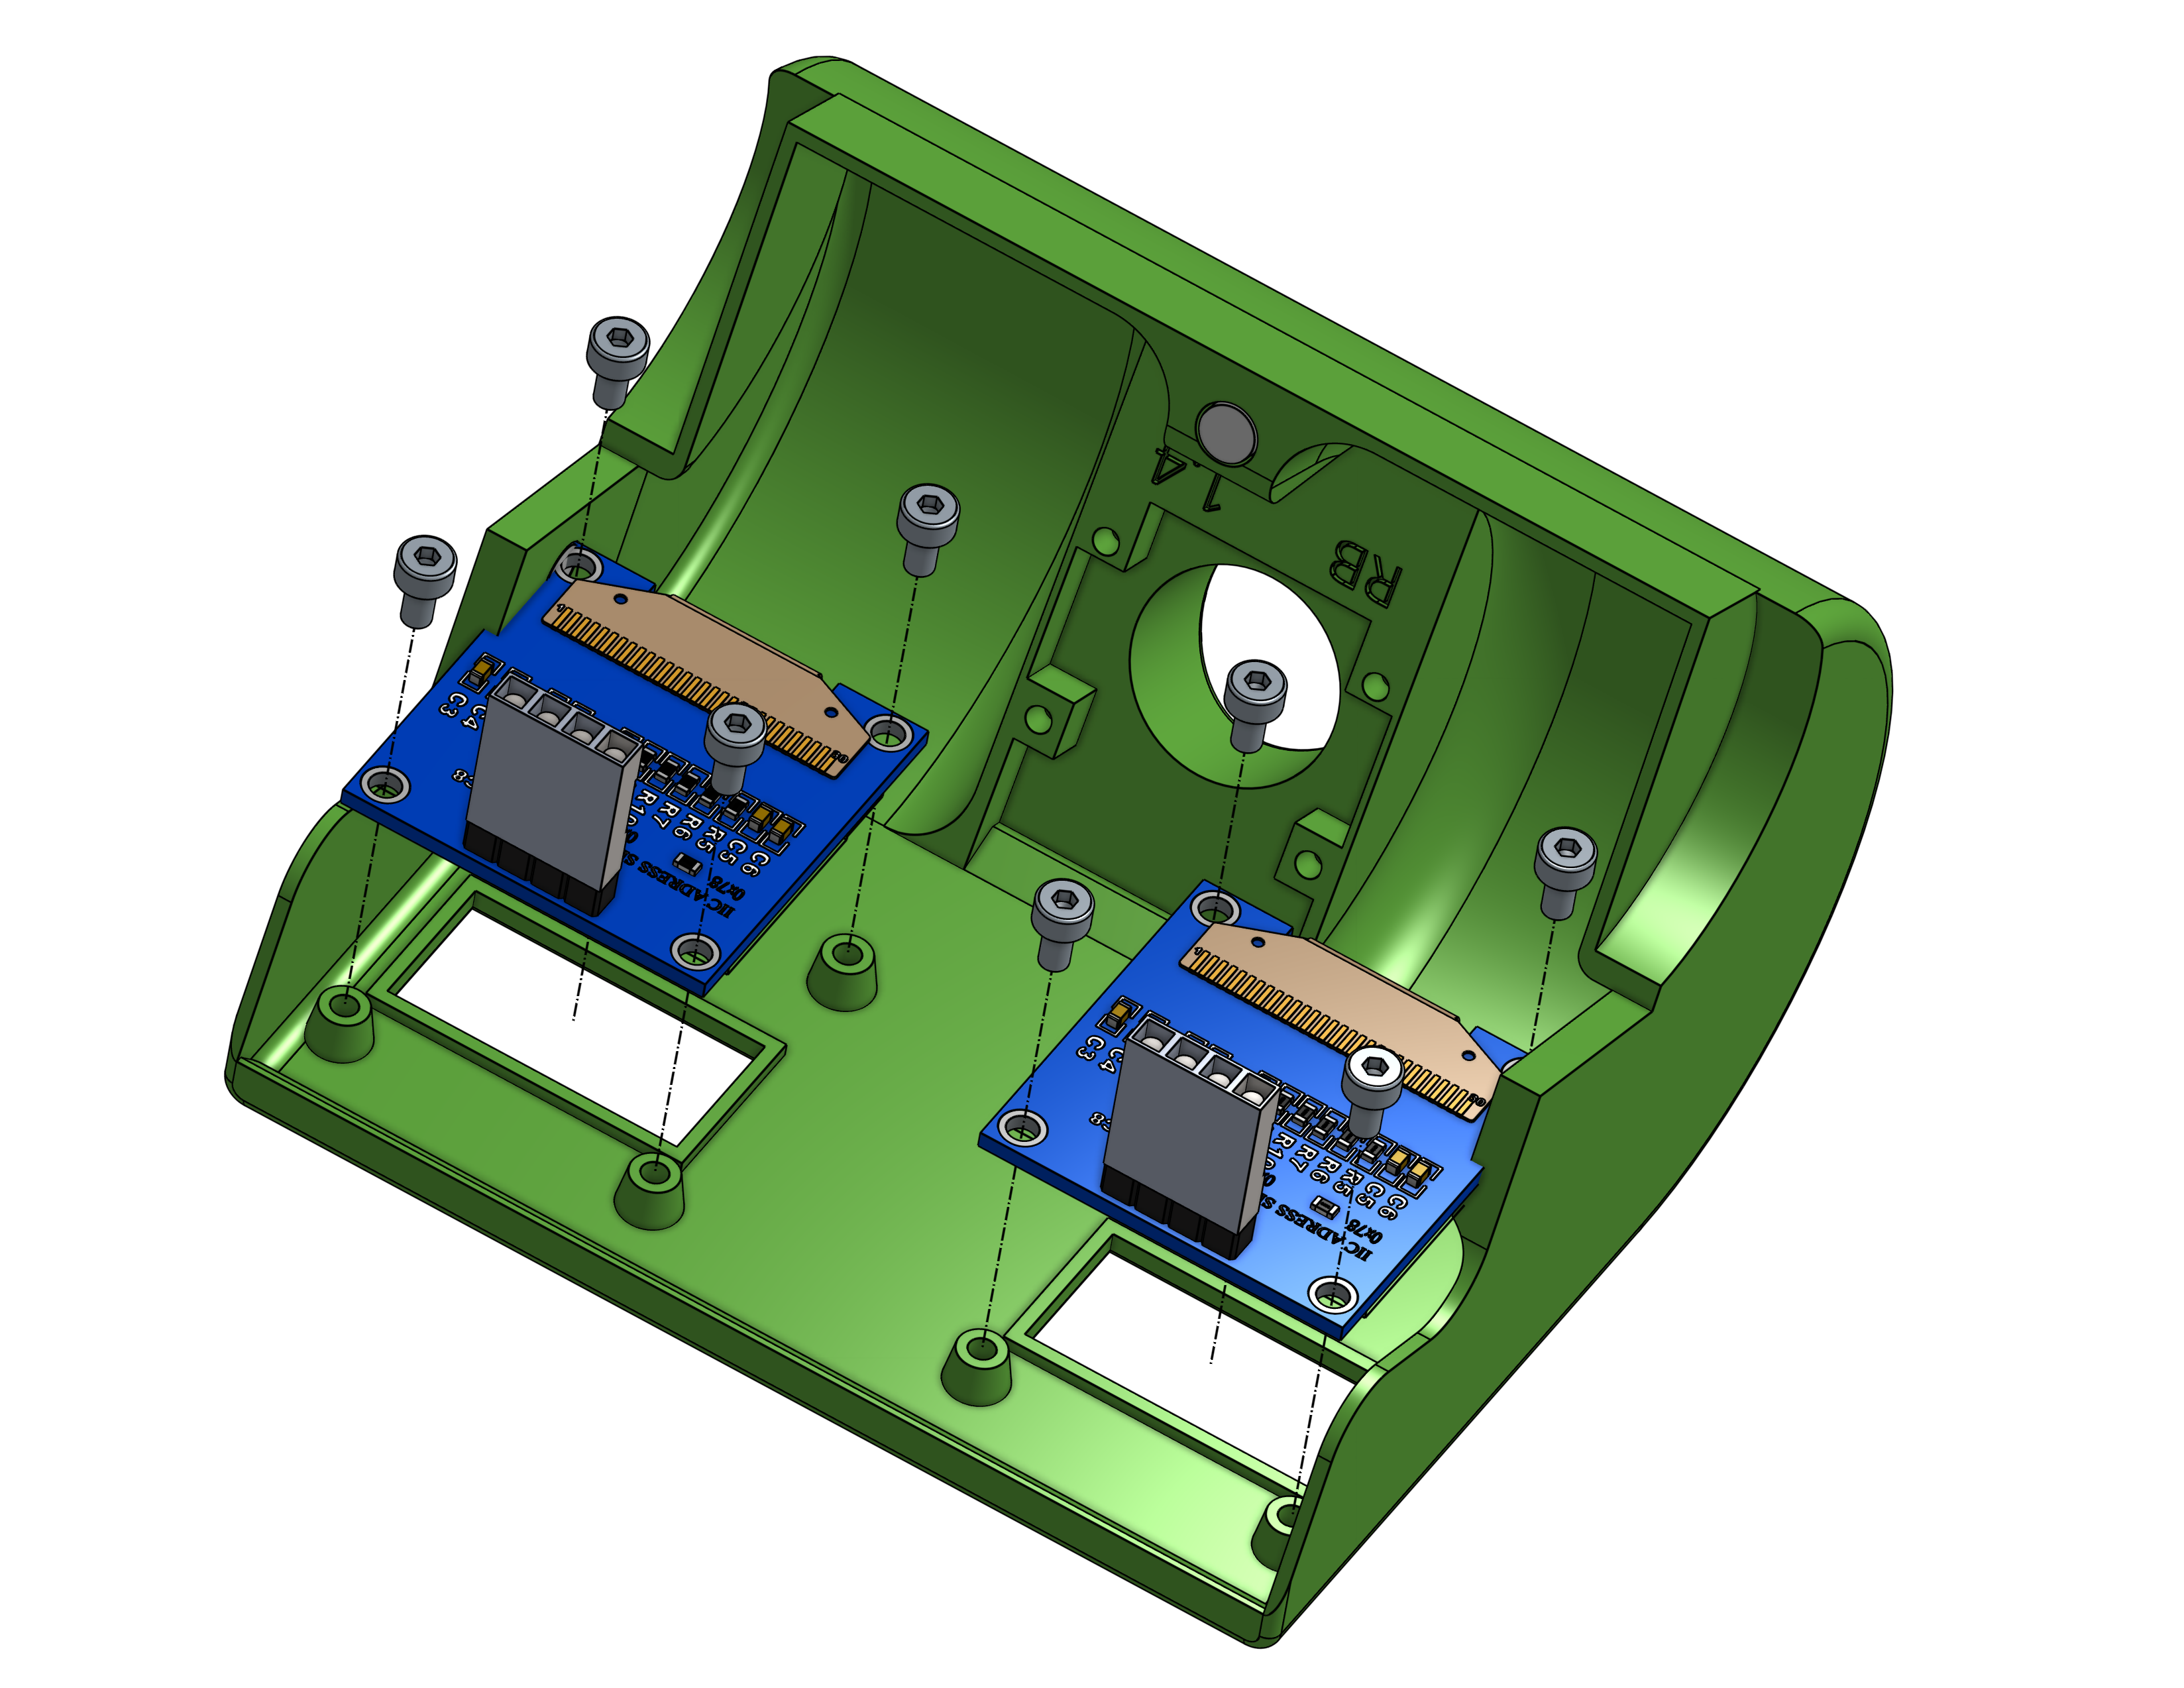
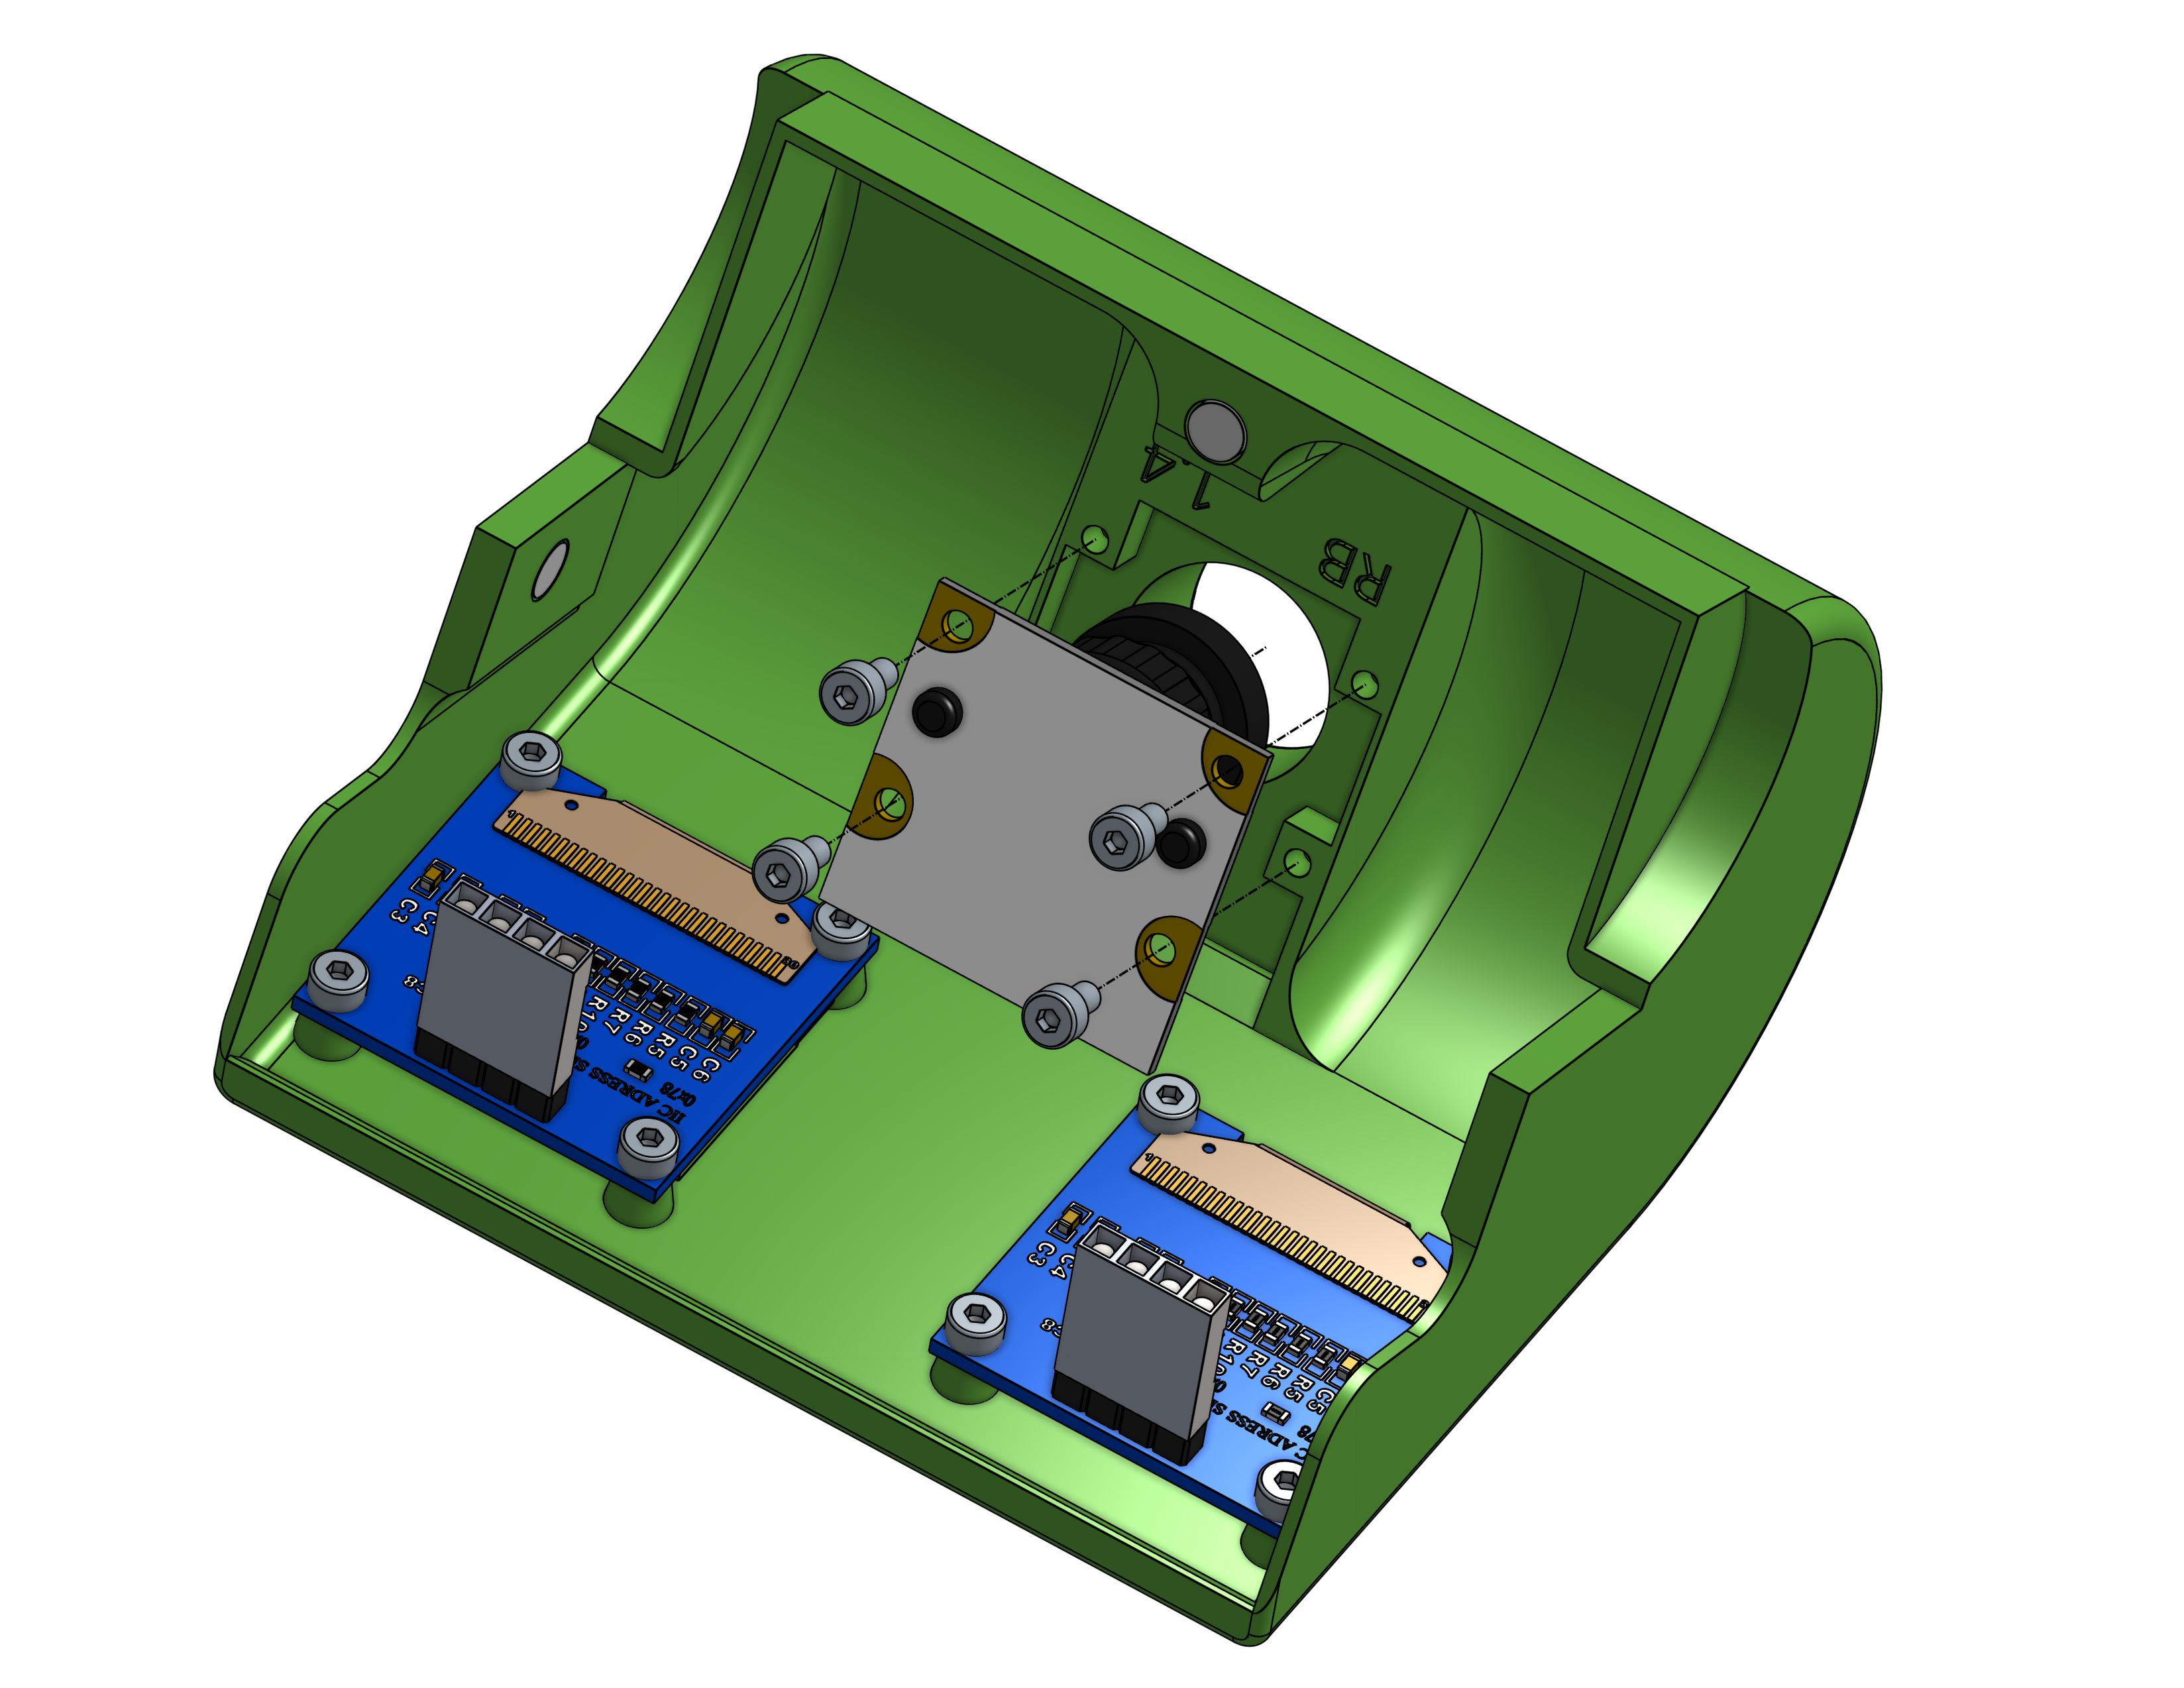
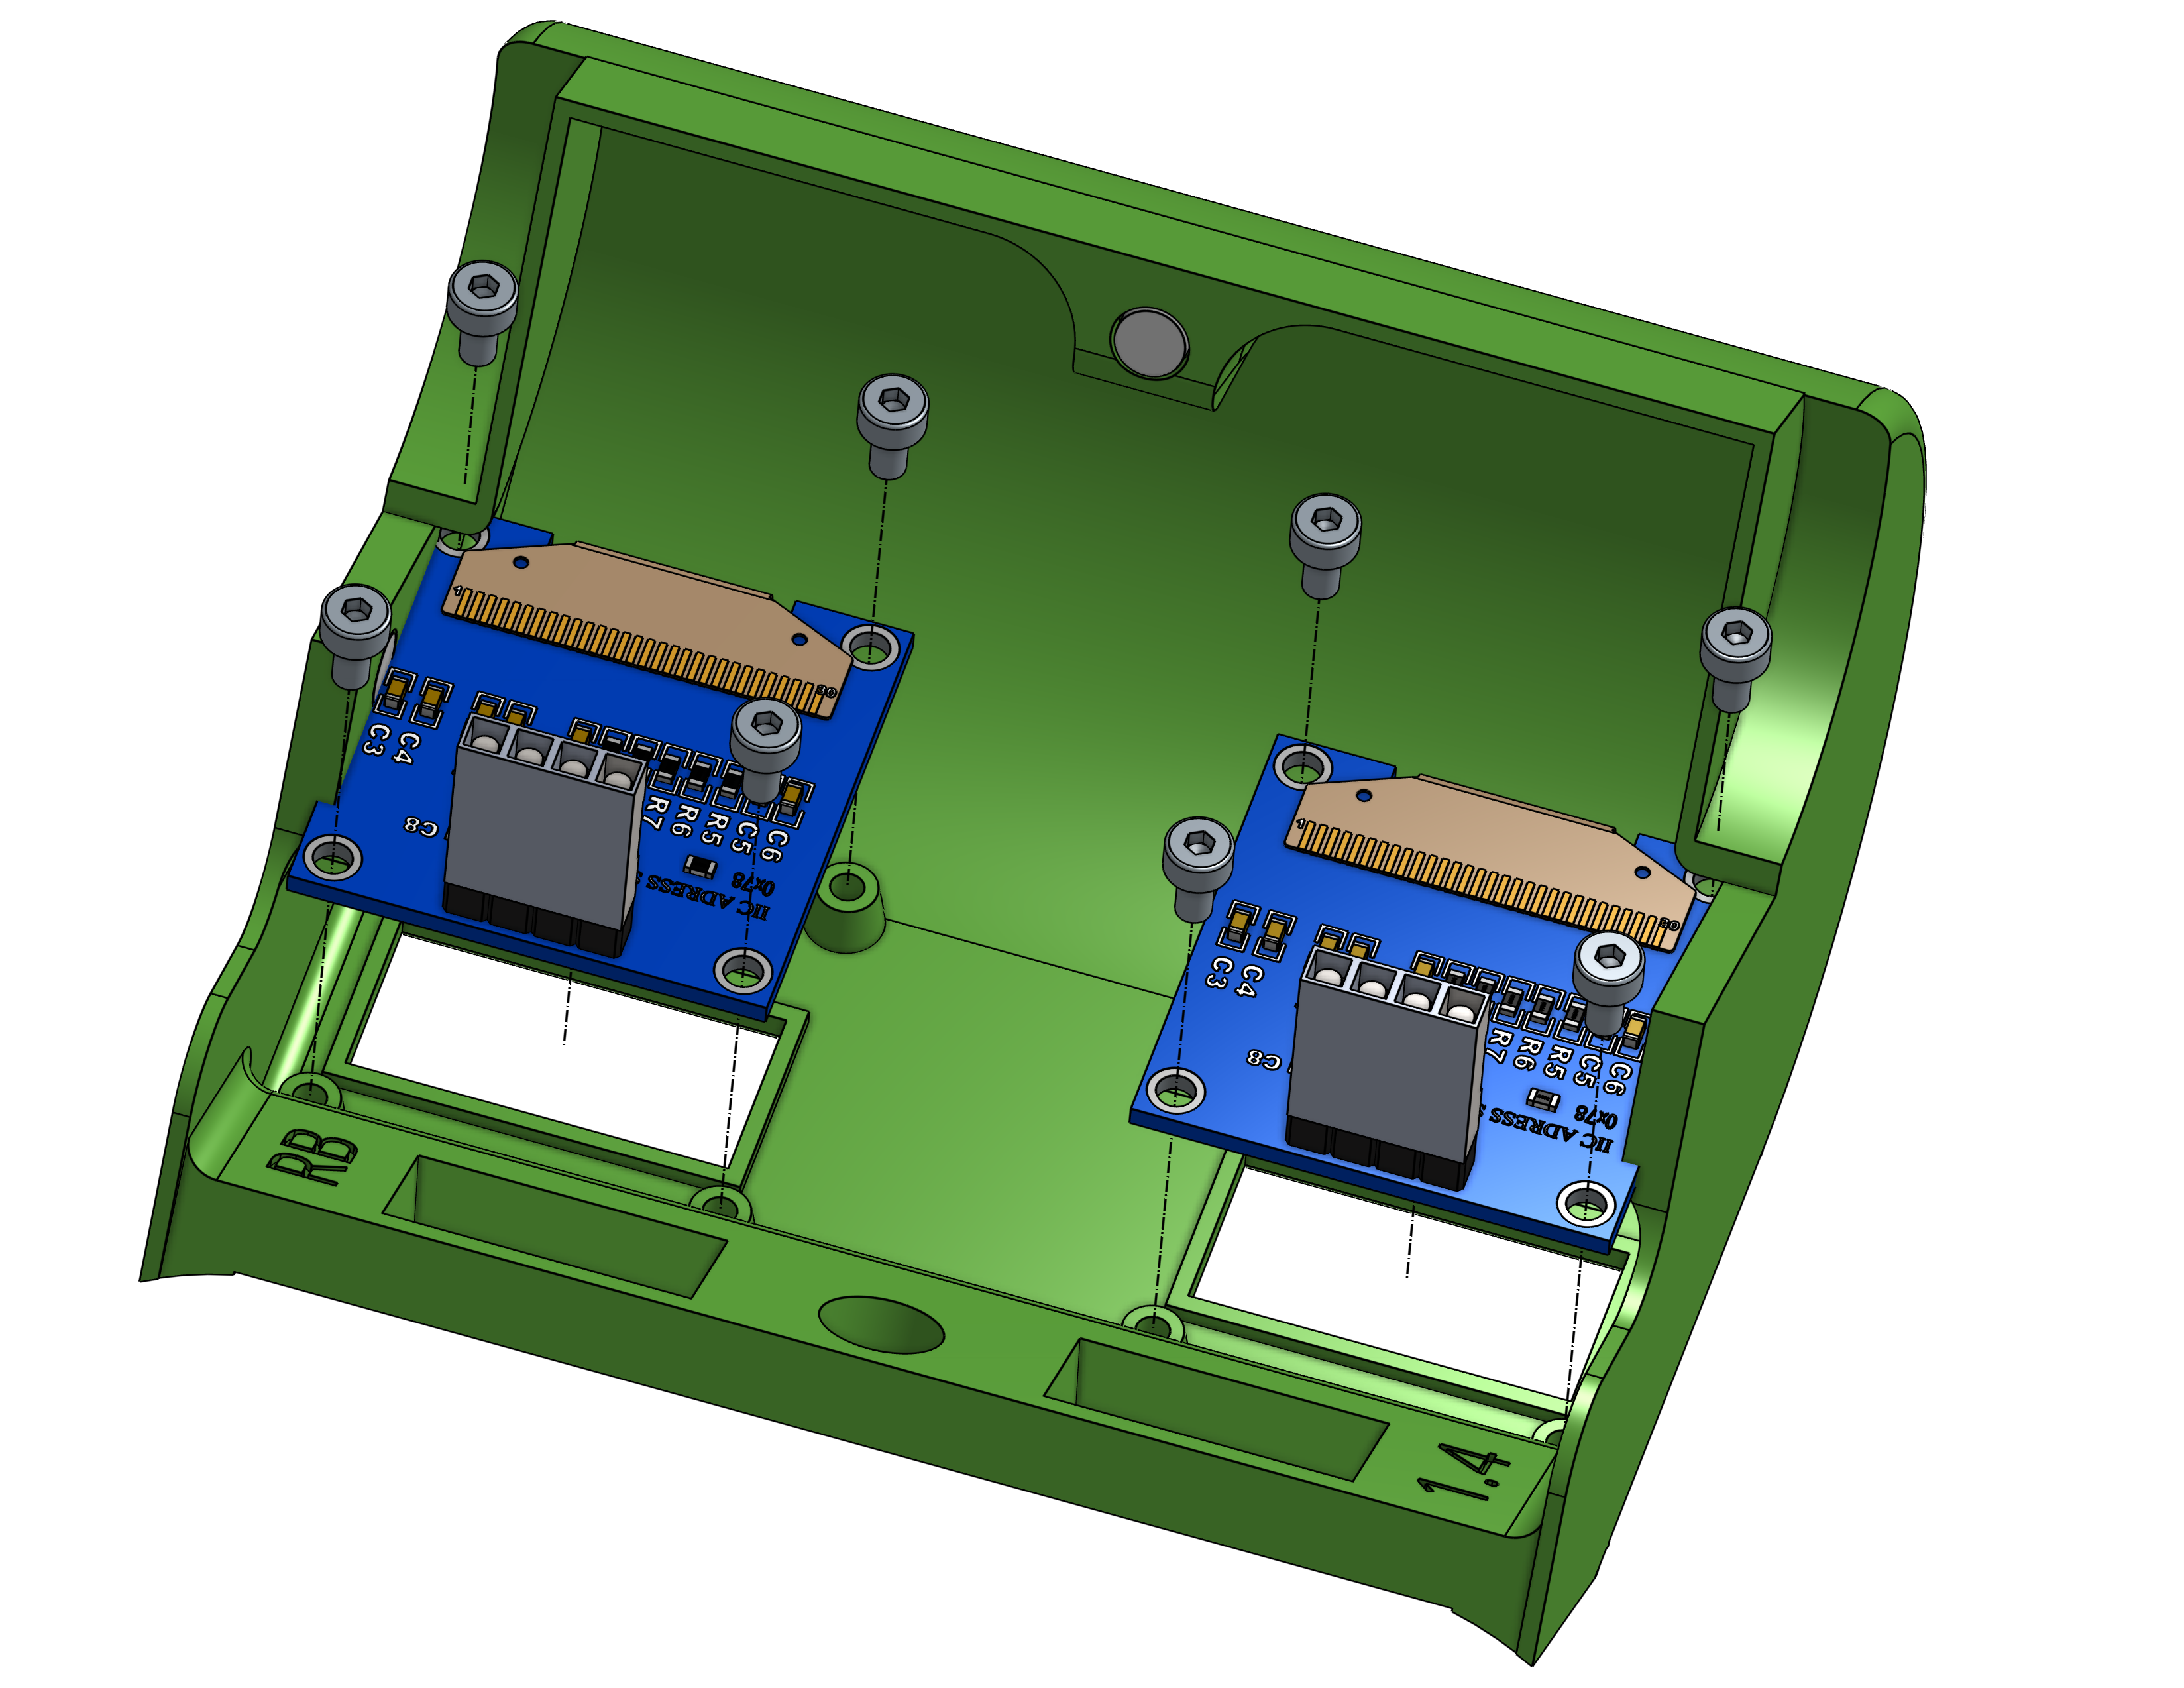
Now follow these steps to assembly this head.
- Bring three magnets and stick on the cover following the picture below
- Screw two 128x64px oLed display
- Screw the PI Cam
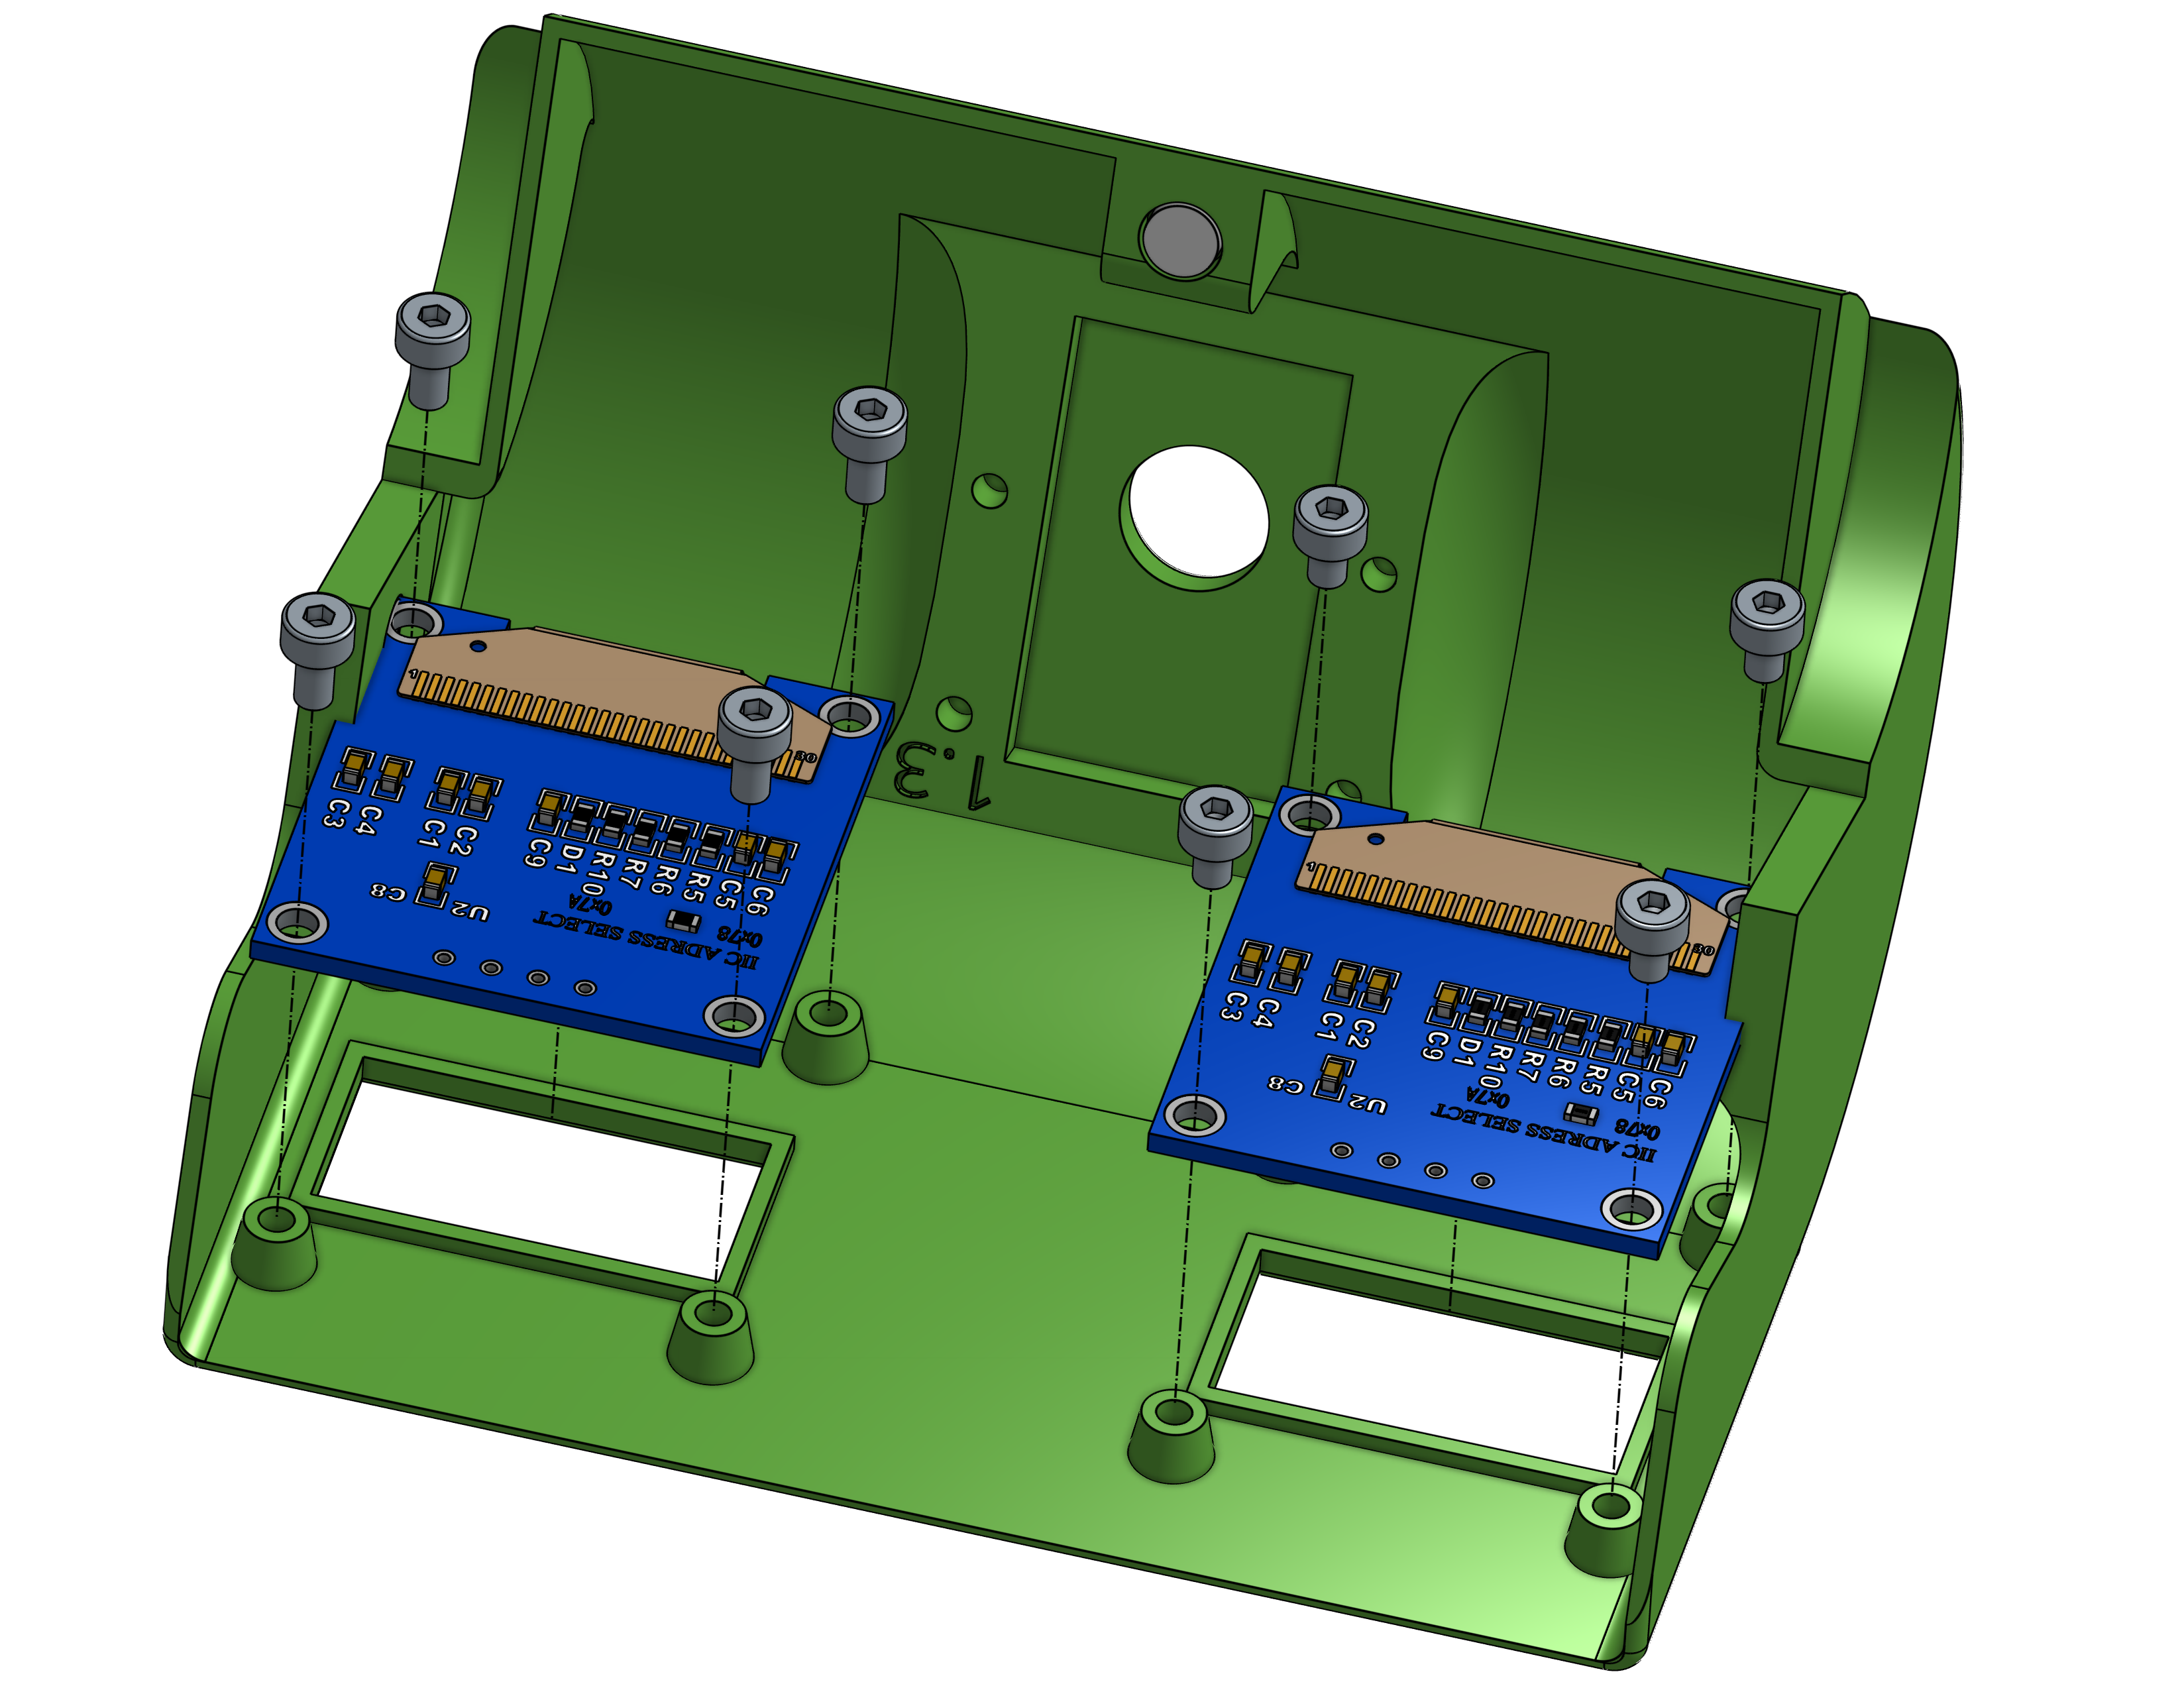
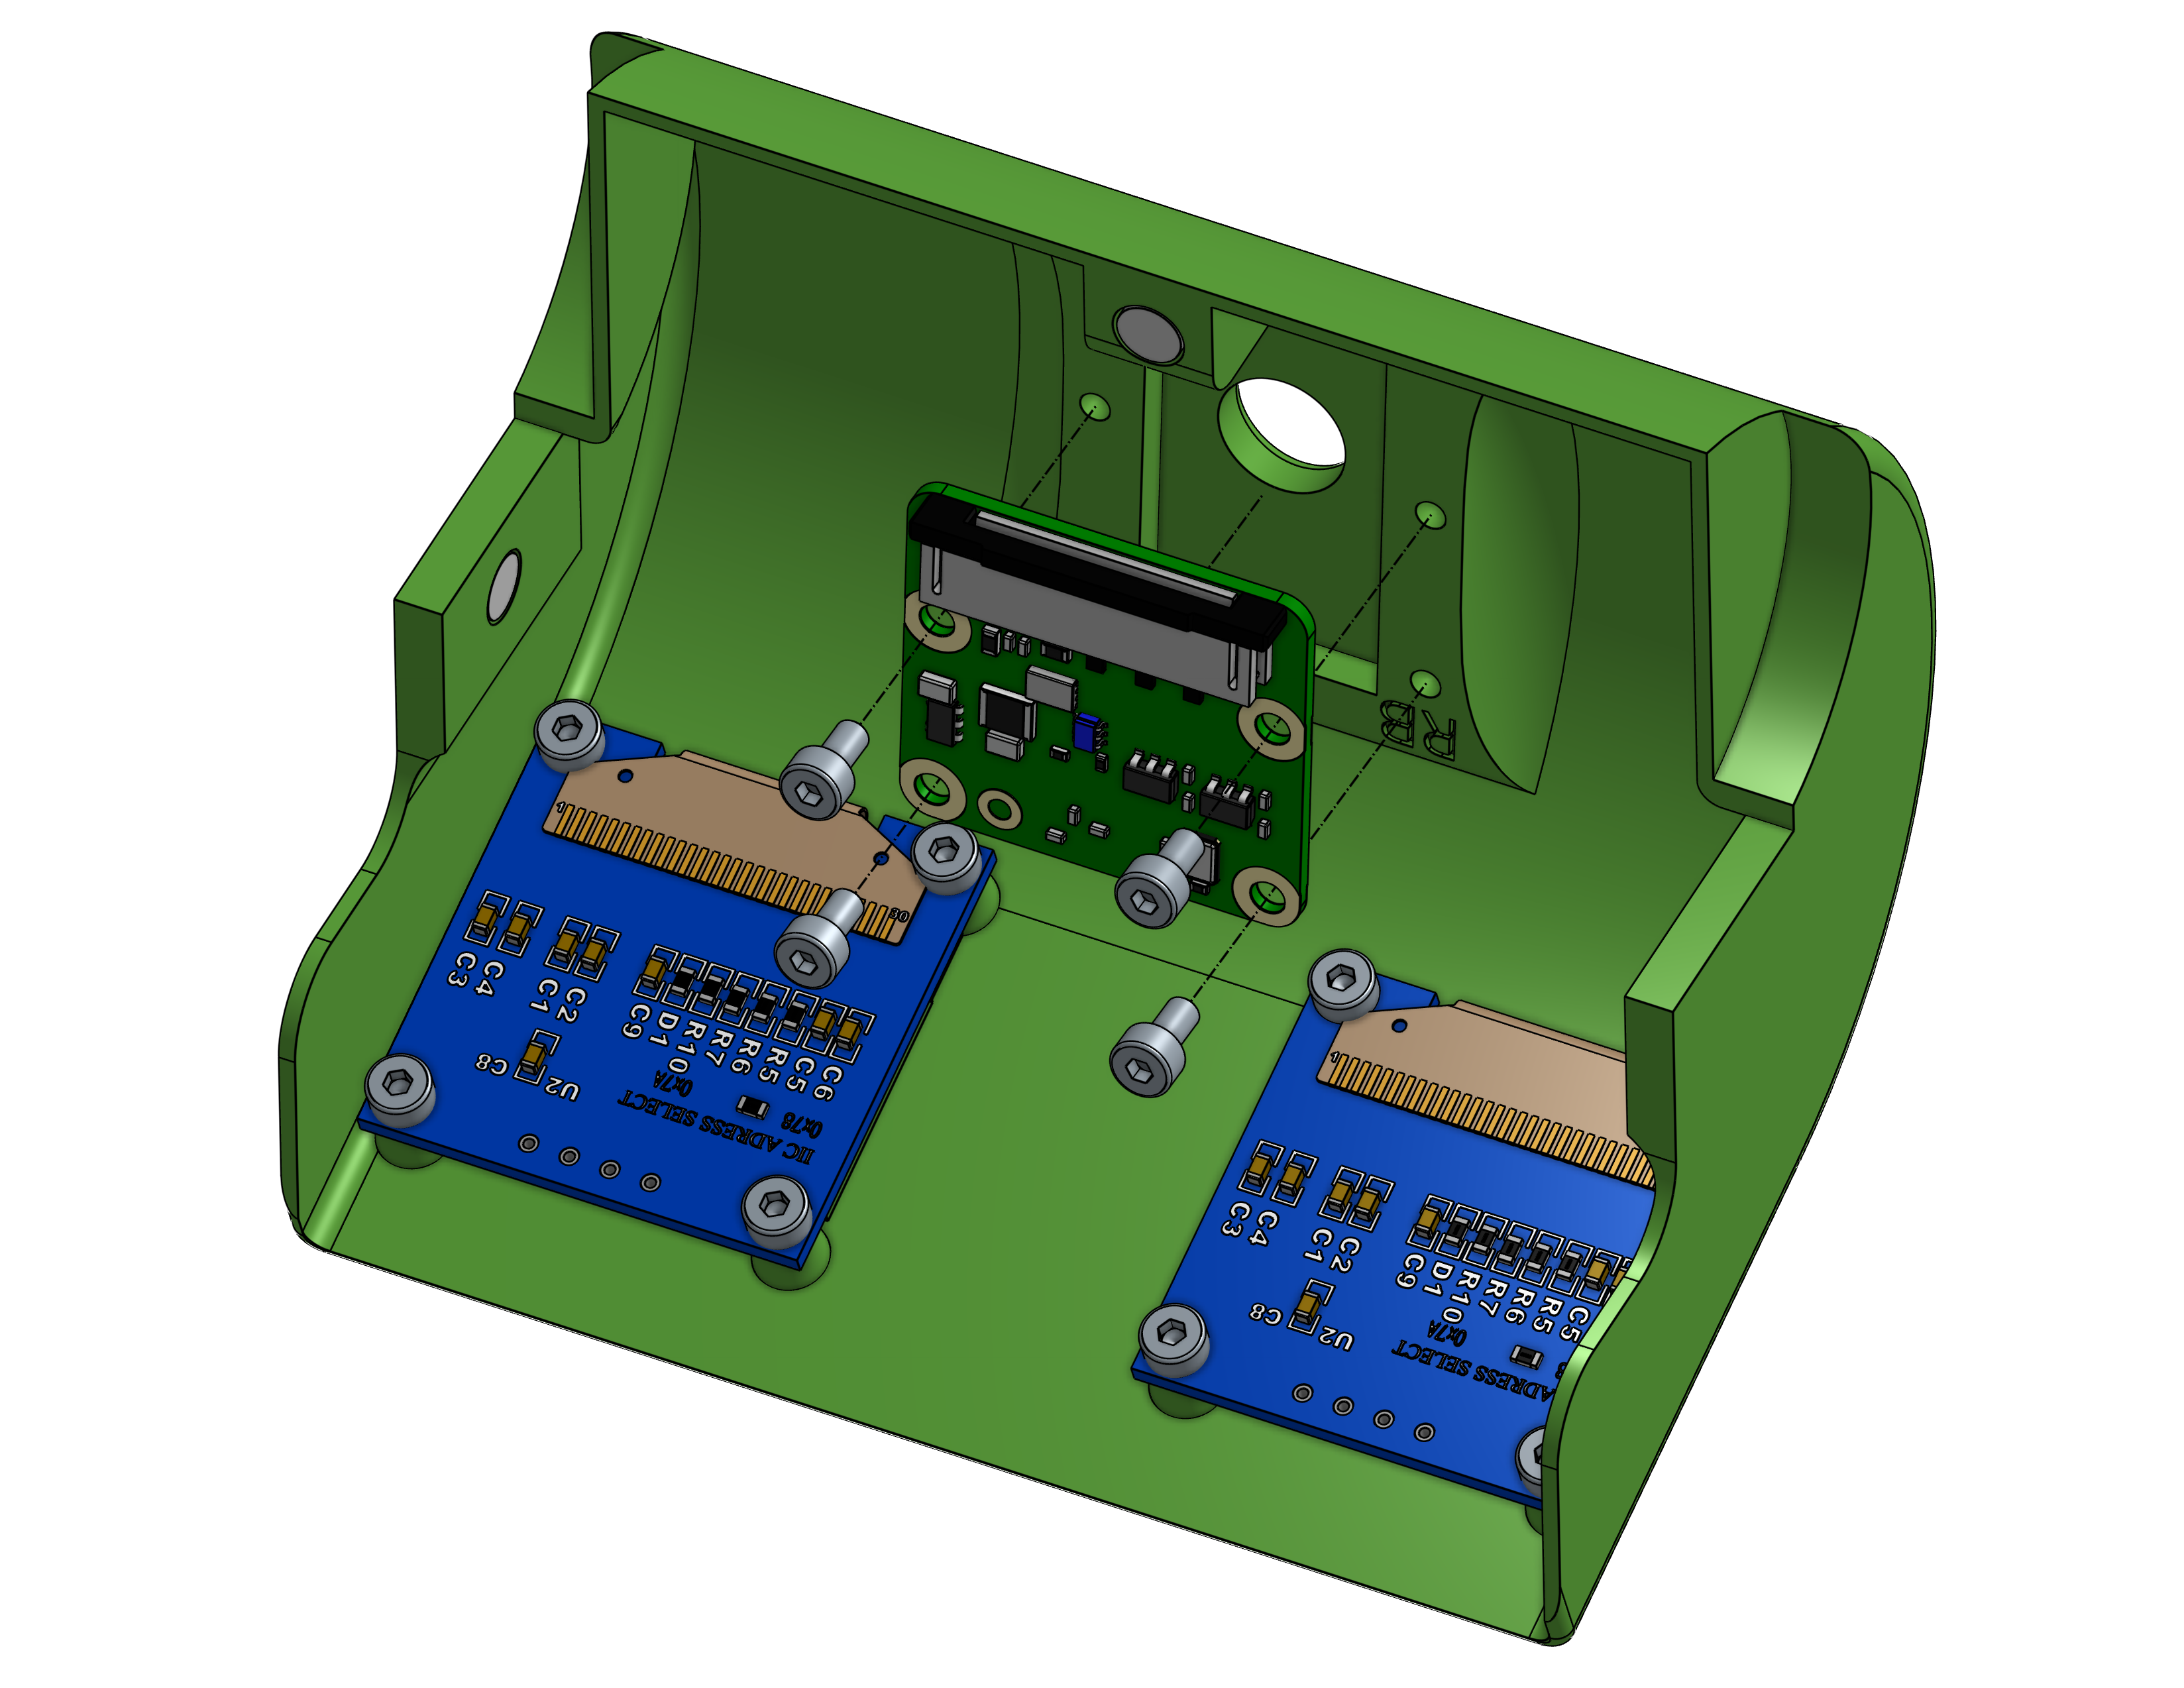
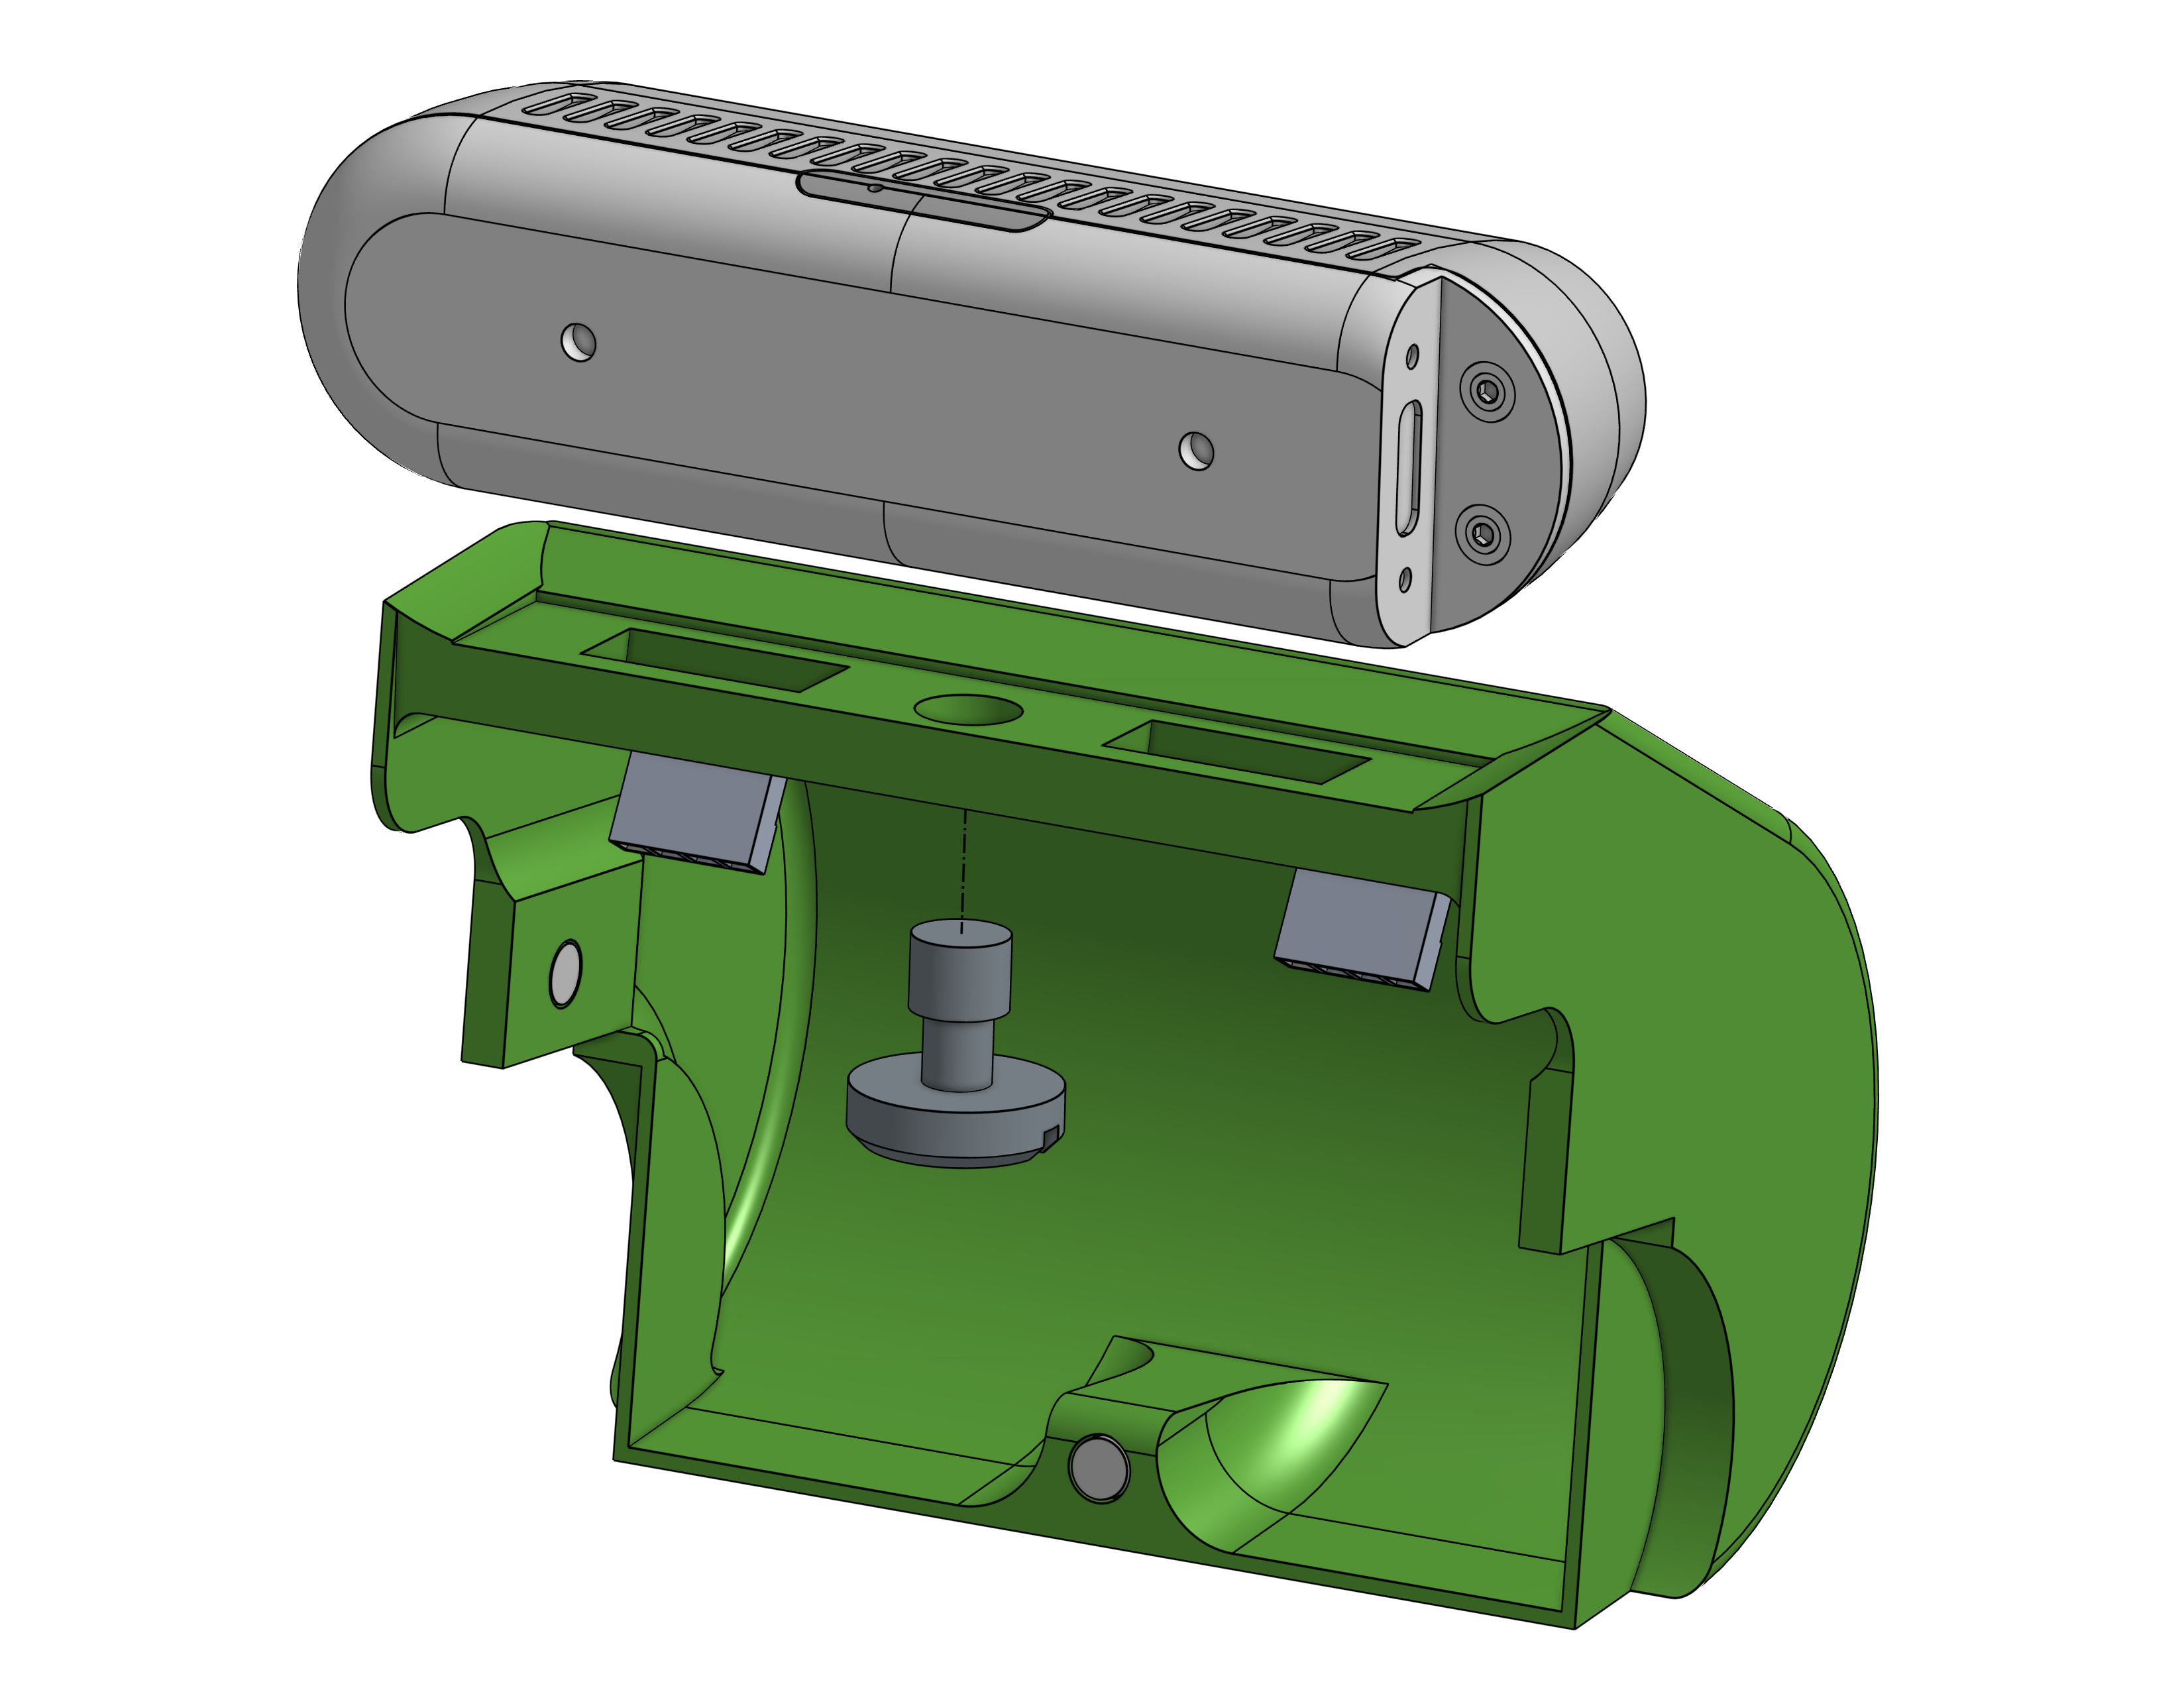
When the cover will be fully assembled, looks like the picture below. Remember to check that the flat cable look the base of the robot.

Wide angle camera (Fish-eye)
This documentation is for a Waveshare IMX219-160 Camera cover. The Bill of Material needed is in the table below:
| Qt | Part |
|
|
|
|
Notes |
|---|---|---|---|---|---|---|
| 1 | Waveshare IMX219-160 Camera |
Amazon |
Amazon |
Amazon |
Amazon |
3D print wide camera cover
| Quantity | Part | 3D view |
|---|---|---|
| 1 | cover-fe.stl |
I suggest orienting the STL following this picture and setup with:
- Supports: Disable
I suggest orienting the STL following this picture and setup with:
- Supports: Disable
Assembly wide camera cover
Components to pick up
| Quantity | Part |
|---|---|
| 1 | cover-fe.stl |
| 1 | Waveshare IMX219-160 Camera |
| 2 | oLED display - 128x64px |
| 12 | Hex M2 4mm |
| 3 | magnet 4x2mm |
![]() Hint If you don’t want to use the magnets, but the screw, follow the optional guide Screw Assembly
Hint If you don’t want to use the magnets, but the screw, follow the optional guide Screw Assembly
![]() Hint To simplify the assembly, dry-fit of all screws after 3D print
Hint To simplify the assembly, dry-fit of all screws after 3D print
![]() WARNING Check the magnets orientation before to stick it!
WARNING Check the magnets orientation before to stick it!
- Bring three magnets and stick on the cover following the picture below
- Screw two 128x64px oLed display
- Screw the Waveshare IMX219-160 Camera
ZED mini
This documentation is for a Stereolabs ZEDmini cover. The Bill of Material needed is in the table below:
| Qt | Part |
|
|
|
|
Notes |
|---|---|---|---|---|---|---|
| 1 | Sterolabs ZED mini | $399 | Stereolabs | |||
| 1 | 90 Degree USB 2.0 to Type C Right/Left Angled Male Cable Gold Plated USB C Extension Cord |
Amazon |
Amazon |
3D print ZED mini cover
| Quantity | Part | 3D view |
|---|---|---|
| 1 | cover-zedmini.stl |

I suggest orienting the STL following this picture and setup with:
- Supports: Enable
- Support structure: Normal
- Support placement: Touching buildplate
I suggest orienting the STL following this picture and setup with:
- Generate support material: Enable
- Support on build plate only: Enable
- Don’t support brides: Disable
Assembly ZED mini cover
Components to pick up
| Quantity | Part |
|---|---|
| 1 | cover-zedmini.stl |
| 1 | ZED mini |
| 2 | oLED display - 128x64px |
| 8 | Hex M2 4mm |
| 2 | Hex M2 8mm |
| 3 | magnet 4x2mm |
![]() Hint If you don’t want to use the magnets, but the screw, follow the optional guide Screw Assembly
Hint If you don’t want to use the magnets, but the screw, follow the optional guide Screw Assembly
![]() Hint To simplify the assembly, dry-fit of all screws after 3D print
Hint To simplify the assembly, dry-fit of all screws after 3D print
![]() WARNING Check the magnets orientation before to stick it!
WARNING Check the magnets orientation before to stick it!
Now follow these steps to assembly this head.
- Bring three magnets and stick on the cover following the picture below
- Screw two 128x64px oLed display
- Screw the ZED mini
Realsense
This documentation is for a Intel realsense d435i cover. The Bill of Material needed is in the table below:
| Qt | Part |
|
|
|
|
Notes |
|---|---|---|---|---|---|---|
| 1 | Stainless Steel 1/4” Mounting Screw |
Amazon |
Amazon |
Amazon |
||
| 1 | 90 Degree USB 2.0 to Type C Right/Left Angled Male Cable Gold Plated USB C Extension Cord |
Amazon |
Amazon |
|||
| 1 | Intel Realsense d435i |
Amazon |
Amazon |
Amazon |
Amazon |
3D print Realsense cover
| Quantity | Part | 3D view |
|---|---|---|
| 1 | cover-rs.stl |
I suggest orienting the STL following this picture and setup with:
- Supports: Enable
- Support structure: Normal
- Support placement: Touching buildplate
I suggest orienting the STL following this picture and setup with:
- Generate support material: Enable
- Support on build plate only: Enable
- Don’t support brides: Disable
Assembly Realsense cover
Components to pick up
| Quantity | Part |
|---|---|
| 1 | cover-rs.stl |
| 1 | Realsense D435i |
| 1 | Waveshare IMX219-160 Camera |
| 2 | oLED display - 128x64px |
| 12 | Hex M2 4mm |
| 3 | magnet 4x2mm |
![]() Hint If you don’t want to use the magnets, but the screw, follow the optional guide Screw Assembly
Hint If you don’t want to use the magnets, but the screw, follow the optional guide Screw Assembly
![]() Hint To simplify the assembly, dry-fit of all screws after 3D print
Hint To simplify the assembly, dry-fit of all screws after 3D print
![]() WARNING Check the magnets orientation before to stick it!
WARNING Check the magnets orientation before to stick it!
Now follow these steps to assembly this head.
- Bring three magnets and stick on the cover following the picture below
- Screw two 128x64px oLed display
- Screw the Realsense
OAK D-lite
![]() Hint New cover coming soon!
Hint New cover coming soon!
LICENSE
The Nanosaur design is under license Creative Commons Attribution-NonCommercial-ShareAlike 4.0 International License.