Install nanosaur
It’s time to install nanosaur on your device, the installation command is exactly the same on your desktop or on your Jetson, the nanosaur-cli automatically detect and will install properly all files.
type now:
nanosaur install
Robot setup
If is your first time you install the nanosaur software, the tool will make a new folder called nanosaur in your user home and a new file called nanosaur.yaml the folder structure will be something similar at the graph below.
user-home/
└── nanosaur/
    └── nanosaur.yaml
![]() Note All files and folders will be all collected in the folder
Note All files and folders will be all collected in the folder nanosaur.
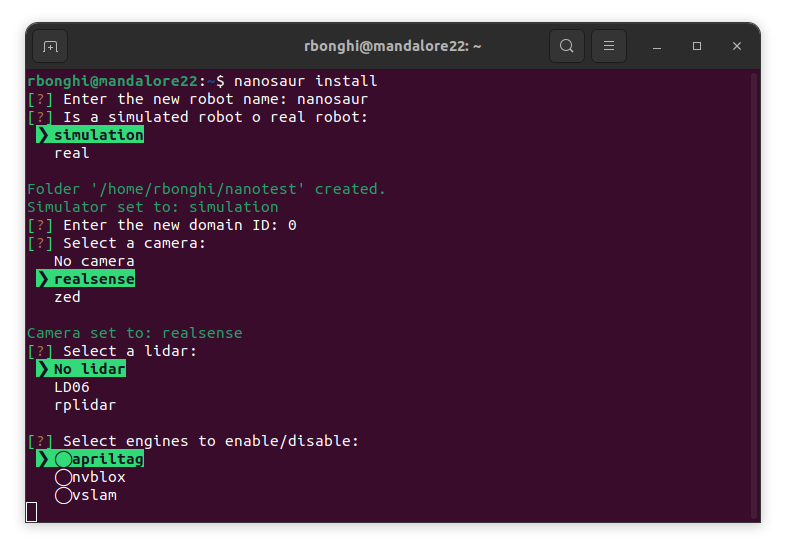
The installation tool will ask some basic information about your robot:
- Robot name (default: nanosaur)
- Simulated (This question is available only for desktop)
- ROS Domain ID (default: 0)
- Camera (default: no camera)
- Lidar (default: no lidar)
- Engines (default: no engines selected)
On your prompt you will see something similar at the picture below.
No worries, if you want change the name, some features, you can always change later, the tutorial will teach you how to work on your robot
🕹️ Tutorial nanosaur configuration
Installation type
Now we are ready to install all software (if needed) on your Desktop or NVIDIA Jetson
There are three options:
- Simple
- Developer
- Maintainer
You will see now something like the image below:
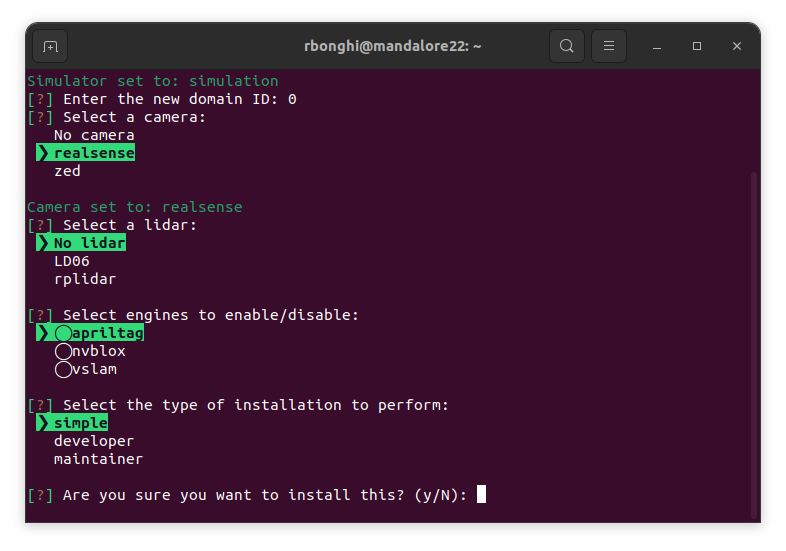
Every installation will install a specific part of the software, in the next section we will go deep on the installation functionalities.
Install simple
This installation will only copy a file called docker-compose.yml where are defined all docker images and when you will start the robot everything will be pulled and start from there.
This installation is pretty safe, and doesn’t need any type of extra software. It’s extremely helpful when you want start to use nanosaur and you don’t want any extra software installed on your computer.
user-home/
└── nanosaur/
    └── nanosaur.yaml
    └── docker-compose.yml
If the installation will works fine, you will see something like the image below:

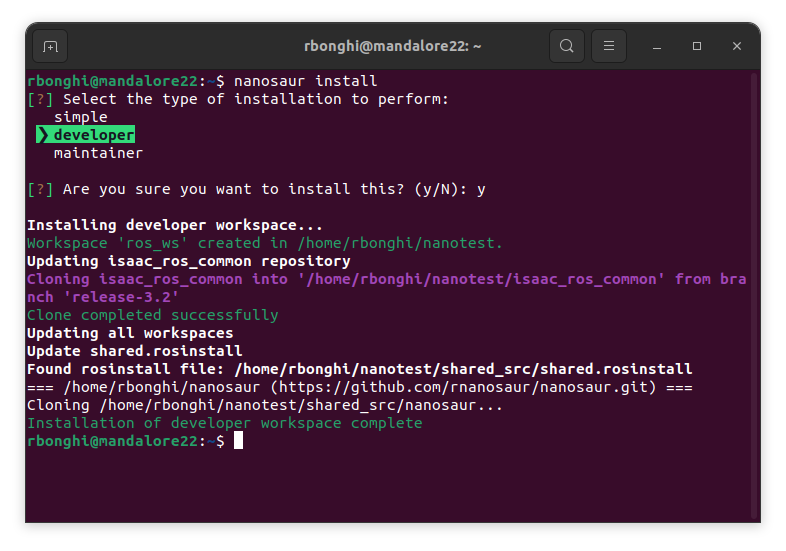
Install developer
This installation is designed for developers want to work with nanosaur and designed or use for teaching. This installation, make some extra folders to work with Isaac ROS make a default ros_ws workspace.
user-home/
└── nanosaur/
    └── isaac_ros_common
    └── shared_src
    └── ros_ws
    └── nanosaur.yaml
    └── docker-compose.yml
If the installation will works fine, you will see something like the image below:
If you don’t know what is ROS and you want to start with nanosaur follow the nanosaur beginner course.
If you already work with ROS 2 and you want to skill with nanosaur and Isaac ROS the nanosaur intermediate course fit for you.
📙 Course nanosaur intermediate
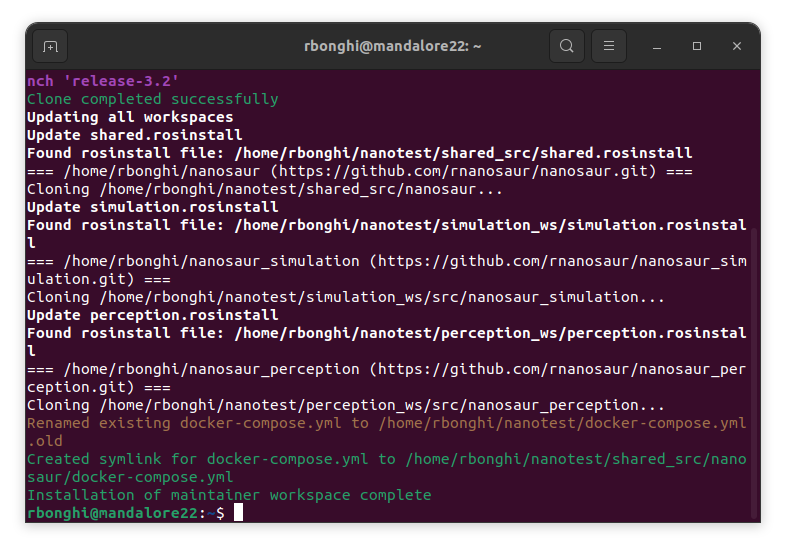
Install maintainer
When you install nanosaur in maintainer mode you have full access to all source code and you can modify, add new features and help on the nanosaur development!
This script will load all ROS workspaces where the software is running, and depending on which architecture you are, build all workspaces and clone all repositories to work deeply on the robot.
![]() WARNING This configuration is suggested for developers want to modify the nanosaur architecture and want to make improvements, if you want only design new software and work with the default nanosaur configuration this installation is NOT for you.
WARNING This configuration is suggested for developers want to modify the nanosaur architecture and want to make improvements, if you want only design new software and work with the default nanosaur configuration this installation is NOT for you.
user-home/
└── nanosaur/
    └── isaac_ros_common
    └── shared_src
    └── perception_ws
    └── simulation_ws (only on Desktop)
    └── robot_ws (only on NVIDIA Jetson)
    └── nanosaur.yaml
    └── docker-compose.yml (Link to folder in shared_src)
If the installation will works fine, you will see something like the image below:
This configuration is designed for skilled developers want to modify nanosaur and help for the maintenance, a great idea to start is follow the nanosaur hacker guide.
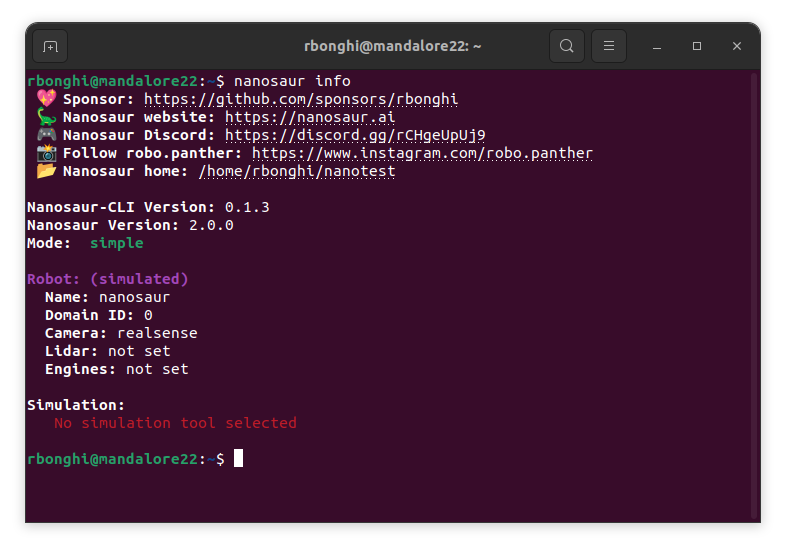
Status installation
You an always check the status of the installation working with nanosaur info, you will see an output like the image below: